Just wanted to say ... thanks for taking the time to stop by, hope you enjoyed your visit.x

Friday 29 August 2014

Stand boldy - My take on Tim's tag for August 2014

Well I loved , loved , loved Tim's tag this month and had already been inspired by the stamping on tape part in some ATC's I created here . So now to put the whole tag's techniques into action . So for all the details and techniques from the master himself hop here. ....
Now for my tag :
All the details can be found on Tim's blog so I will not be sharing those and I followed pretty much the way he had created his tag, changing some embellishments and substituting staples for the sewing he had used..
So here are some close ups ..
I loved the gorgeous colours and textures he created on his tag and tried to create a similar feel

I love the rusty edges and added some rustiness to my embellishments too.


I am afraid no sewing machine, so I added rusty wire and some staples..well lots actually as I love them!


I love the stamping on tissue and had already played with this in some ATC's which can be found here in my trio of trouble .

And a rusty bulb to finish at the bottom..


I rusted my cogs too using distress embossing powder and love the effect it gives .

Well that's my take on Tim's tag and I shall be linking it up here .
Thanks to everyone who takes the time to stop by I am trying to play catch up slowly but life has other ideas!

Wishing you were here

Well over at Country View Crafts today is something a little different, some of the team have created some postcard inspired pieces...so make sure you pop across here to see all the different creations!
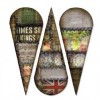
So here is my postcard...I wanted to create something vintage inspired , so here it is :


And here is the back as it felt a shame to leave it plain ...


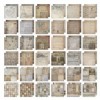
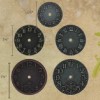
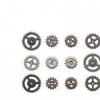
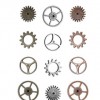
 So here are all the pieces that I collected together for the postcard... I created a background piece ( shown below) I then cut out various pieces from the wallflower and french industrial paper stacks that I wanted to use. I also selected a heart charm and dyed some seam binding.


This doesn't mean that You have to sue all the pieces...but I always collect together pieces that I think will make the final cut when creating like this..
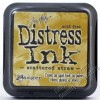
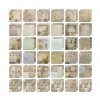
Here is the background created using distress paints and stains, scuffing the edges and then inking with walnut stain. I wanted this to give my postcard some thickness and so I could stamp the details for the back.


first I tied the seam binding around the main image and then added to the base postcard.


I decided that there was something missing from my collection of pieces as when I placed them on the card and moved them around until happy it was missing something, so decided to add some butterflies. This time I used some of the gorgeous ones from the wallflower paper stack and just added some colour suing distress markers and a water brush. I tend to collect a palette of colours together and don't always use them all.


I then added some colour and washed with water from the waterbrush to blend and soften .


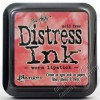
Now for the details, I inked the cut flowers with walnut stain and added some glossy accents to sprinkle over rock candy distress glitter for a little added detail .


The butterflies were just glued in the middle so I could shape the wings..I know if Mr Postie got them they would get squished..but they looked pretty!


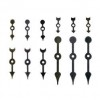
I added the heart charm on a jump ring..( a Paris image inside too..lucky I had not used that one :) )


More butterflies and a hash tag stamp complete the card..
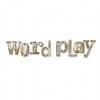
For the background I stamped the word postcard and added some text and a stamp cut from the paper stacks x

Thanks for stopping by I really appreciate people taking time out of their busy lives to pop by and visit!


Thursday 28 August 2014

mini fold book sneak peak for Country view Crafts x

Well it is time for my next project over at Country View Crafts and the project can be found here . So if you would like all the details of how this was created please follow the link . So here is the sneak peak :

Friday 22 August 2014

A trio of trouble

Well it is time for a new challenge over at a Vintage Journey and the theme chosen , by the lovely Alison is A little bit of Tim. This challenge focuses on creating something small and here in Alison's words are the details of the challenge : 

Keep it small please!  I'm looking for Vintage and Tim Holtz style ATCs - a single ATC or a set - perhaps a trio that match.  And I'm being a purist here, so only ATCs, please - no ATBs or Chunky ATCs allowed.


So I have made a trio of ATCs and here they are :


I wanted to make them a set of three with some connection and love these stamps designed by Brett Weldele for Tim Holtz and so decided to use these. I was inspired to stamp on the tissue tape by Tim Holtz tag for August 2014 which can be found here.

So here are the details :
 I die cut my ATC's using the ATC die from Tim Holtz , using really thick card. I then added some strips of tissue tape and inked with iced spruce around the edges.


i then added some frayed burlap, I do love this colour!


Next I spritzed some water into the palm of my hand and flicked across the surface of the ATC. Left for a few seconds and then dried with heat tool/ Large drops can be dried off with a paper towel.


Now I splodged my tumbled glass distress stain onto my craft sheet to make sure it was coming out and the dragged across the top of my ATC and spritzed with water to create drips and dried with heat tool.


 Now for the stamping...I only wanted part of the image and wanted to make sure I was careful where the ink went so I tore a piece of scrap paper and used this to mask off the area I wanted to ink. I inked the stamp using jet black archival, then  removed paper and stamped onto ATC .

I added some detailed stamping using distress ink and used stamp unmounted from block, curving stamp in hand to pick up random ares of the inked stamp.

 
Here are the finsihed backgrounds , I added some stencilling using layering stencils and distress ink, the ink blending tools are great for this and allow much more careful use of small areas of the stencil!


  Now for the stamping...I only wanted part of the image and wanted to make sure I was careful where the ink went so I tore a piece of scrap paper and used this to mask off the area I wanted to ink. I inked the stamp using jet black archival, then  removed paper and stamped onto ATC .


So here are the finished ATC's before embellishing...


But you know me ....I just couldn't resist adding some idea-ology!


I also flicked some distress pant across the surface using my splatter brush ...


so hope that you will take the time to pop across here and see all the gorgeous makes from the other Creative guides and that hopefully you feel inspired to join us in this part of the journey and join in the fun....

Thanks for stopping by !

Thursday 21 August 2014

Playing with words #2 for Country View Crafts

Well the monthly challenge over at Country View Crafts is till running and the theme is word play. You can find my first piece here and now for my second piece :


I decided to create a piece focusing on affairs of the heart and using all my favourite distress goodies and browns again...I cannot seem to help myself...maybe one day I will do something really bright and shock myself!
I started by covering some mountboard in Tim Holtz paper and scuffing, sanding , spritzing and generally distressing..adding ink and picket fence stain and then flicking over water and drying..


Now for the heart I die cut two pieces from petal die, and covered in rock candy crackle, applying antique linen distress paint when dry.


Then to form the heat I stapled the two pieces together..


I love the crackle against the metal staples..


Here is the heart in place complete with lots of twirly wire and a die cut & covered with antique linen distress glitter and inked. Some more staples hold the wire in place .


The words you and me were cut 
from word play die and inked up using walnut stain ..


I then added some chit chat stickers that I felt went with the piece and of course a few cogs...


Well hope you like my make and if you fancy joining in for the chance of a GD spot or to win the generous voucher from Susan, whose shop is stacked... then hop here .


Thanks for stopping by x