Just wanted to say ... thanks for taking the time to stop by, hope you enjoyed your visit.x

Wednesday, 15 October 2014

Autumn colours for Frilly and Funklie

Well the latest challenge over at Frilly and Funkie is Autumn colours and I have gone all Wendy Vecchi with this make...and some distressly goodness of course. So here is my autumn coloured make :


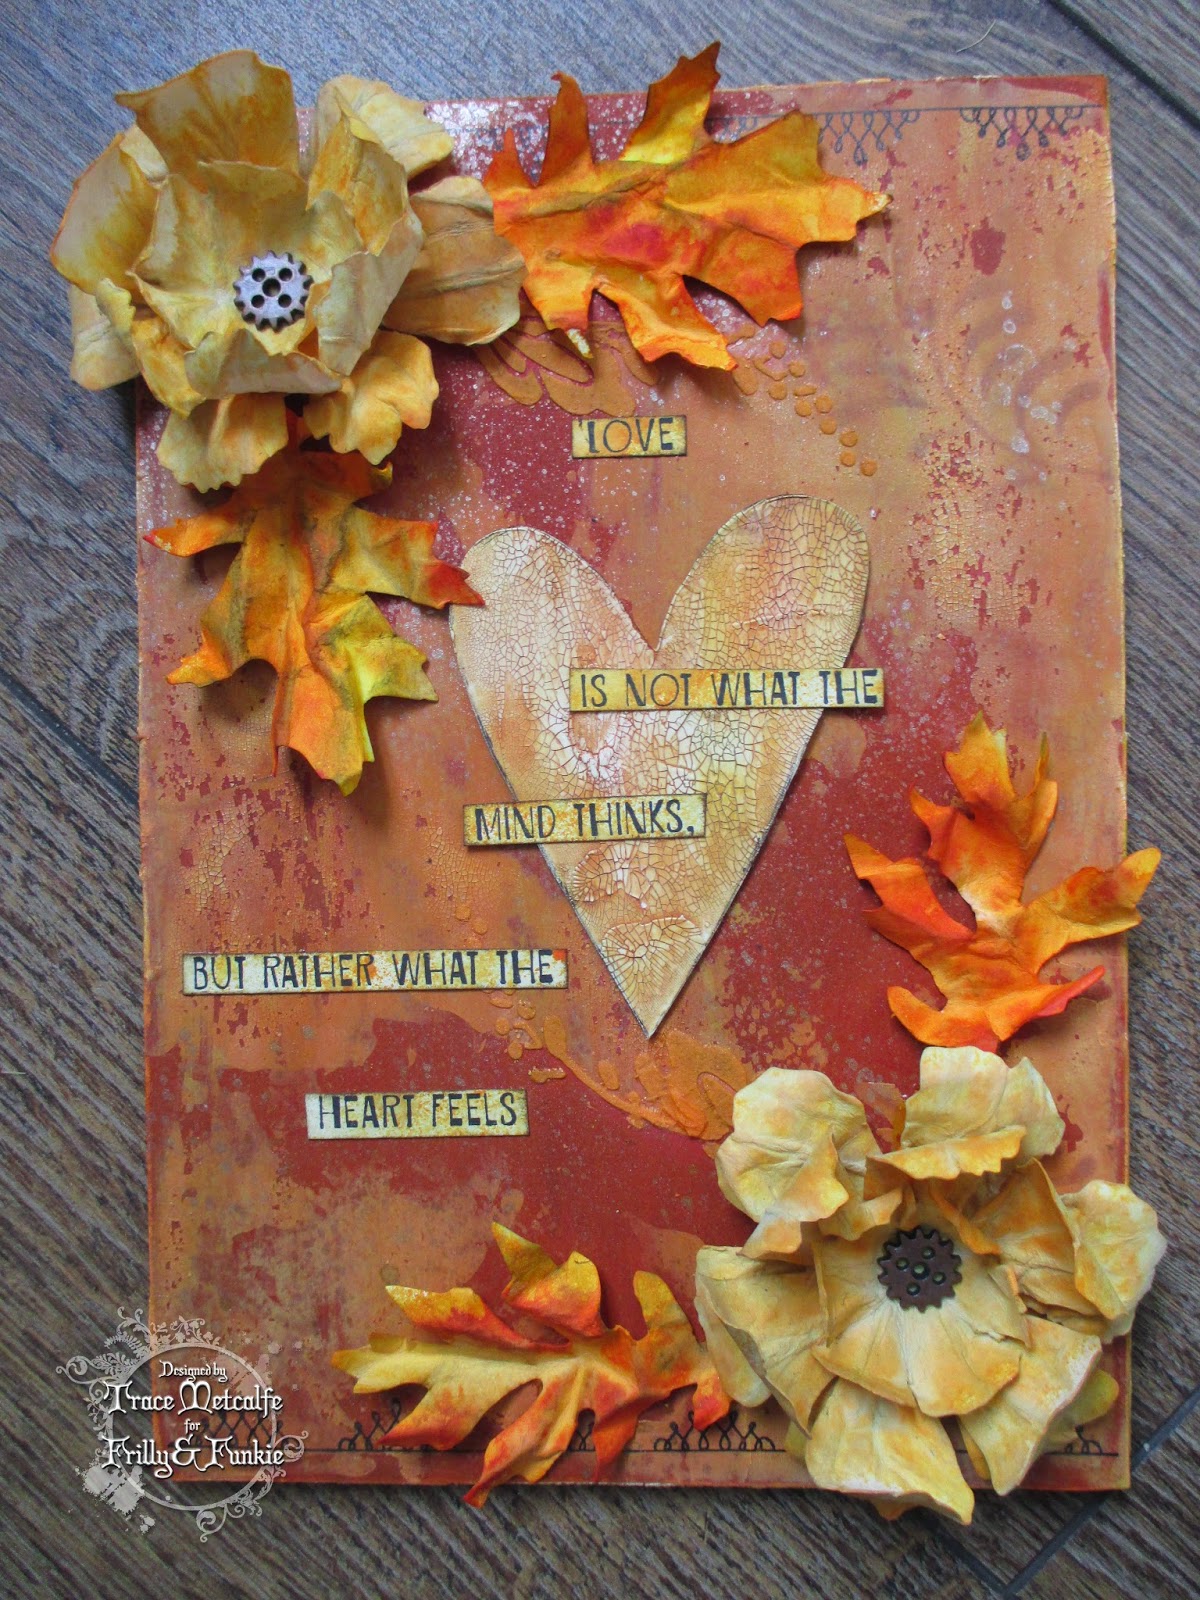
I  love the rich tones of autumn and although I am not a regular colourful crafter I had fun making this piece. I used some of the new distress sprays to create these flowers using the tattered floral die. and plenty of spritzing of the new distress stain sprays for the leaves too , mixed with stains for the colours I don't yet have.


The background used distress stains, sprays and Wendy Vecchi's gorgeous texture paste and crackle paste. You can also see the paste on the heart. believe me this crackle paste is gorgeous!!

I added a Wendy Vecchi quote stamped and cut into pieces to fit on my piece.


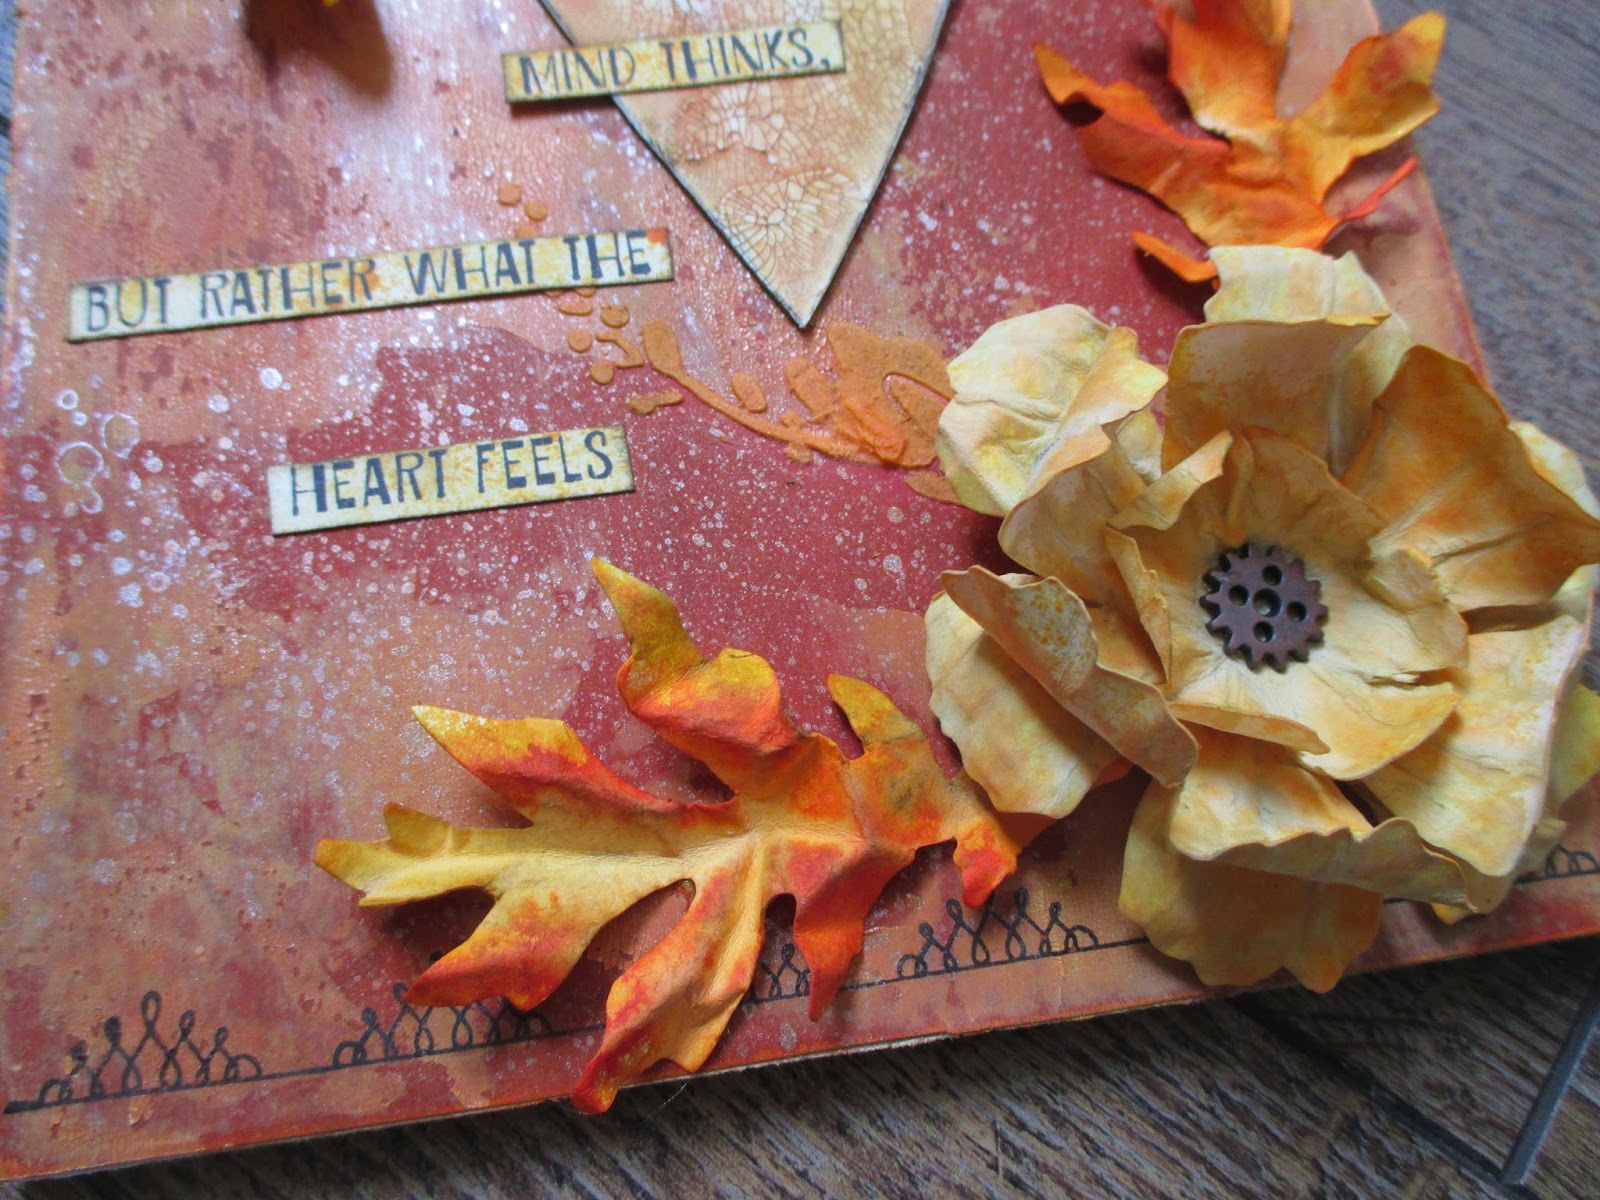
See the gorgeous squiggly border, stamped in archival ink again a Wendy Vecchi stamp. Look at the sparkle from a little of the metallic distress stain spray.


And the yummy crackle on the heart ....Also the detail of the white texture paste coloured up and added through a Wendy Vecchi stencil.


I am back on the Frilly and Funkie blog on Saturday 25th October with a step x step of how I created this project..full of all the details...


make sure you pop across and see all the rest of my fab team mates autumnal makes and maybe you will be the lucky winner or guest designer ...you have o be in it to win it!

keep those fingers inky and those hearts full!
trace x 

Wednesday, 1 October 2014

a spooky book of spells

Well the theme over at  Frilly and Funkie is Haunted Halloween and here is my spooky book of spells. I have had a ball making this and hope that it comes across.


Now I had lots of step by step photos but sadly I had a teensy accident and they are gone :(
So I will try to add the details for how I created this piece and if you have any questions please feel free to email me and I will try and help!

I started with a blank, hollow paperboard book which I covered with black soot distress paint and then added some of Wendy Vecchis yummy paste through a layering stencil.. The wording is cut from the wonderful new alphabet thinlits...a real must have


It gives such a great texture, I then painted over some more black paint and brushed over some treasure gold.

I also added a little shelf ( can just see in the top of the picture using one of Wendy Vecchi's arts parts.
Then onto filling with lots of goodies... I added some vials with great crackle..Apply glue and seal to the bottle, leave to dry then add a layer of rock candy crackle paint and leave to dry.Finally I added some distress stain and heated but alcohol inks work really well.


I also added some small skulls, altered with distress paints. I added more vials filled with white embossing powder and with a rub on on. Die cut some little labels and inked and stamped with script stamp to added detail and tied around bottle necks. I also added lots of cobweb stuff from a Halloween cobweb. ( I mean there are probably a few in the house but these look nice )

I added a spooky spider all glammed up by painting with glue and seal and then sprinkling with distress glitter...not too creepy!? I stamped some of the vials and added inside as well as some poison signs.

Here you can see all the details of the little art part shelf complete with poison and a skull, as all self respecting spooky shelves should have?

  another spider....

 and a few more bottles for good measure!


 and here is another spider who has squiggled his way onto the cover...


 This shows the spine of this spooky book...


  and lastly another rather cobwebby skull on the top of the thick book.


So for more spooky makes from my wonderful team mates please hop here. You still have a week to enter and could be one of our lucky winners. if you are the chosen winner you will have the chance of a GD spot and all entries are eligible for the chance to win $25 shopping spree at the Funkie Junkie boutique.

keep those fingers inky!
trace x

believe in the magic .

Well it is the first of the month and time for a new challenge over at Country View Crafts Challenge and the theme is sparkle and shine. So I have taken the sparkle and shine and given it a vintage feel. I am not a huge sparkle and shine but wanted to show how a little bit of sparkle can be incorporated into vintage style to give it a great lift.
So here is my make :


I absolutely love these found relatives occasions cards and have used them recently here , and thanks so much to Paula Cheney who included those projects on a list of ten that can be found here.

So onwards to how I created this piece, I just love this image and love that I can sand it, distress it and it remains clear and sturdy...did I say I love these cards! 

Now I would have some lovely step by step pictures but sadly there has been a teensy weensy communication issue between me and hubbie and they have been deleted! :( 

So we will have to make do and mend as they say x

I started by covering a piece of MDF about 8" x 7" with paper from holidays past paper stack, oodles of picket fence distress stain and some paint rubbed in. I love how the design can be seen but softly . iIthen edged with walnut stain distress ink and added some glue and seal around edges and dusted with rock candy distress glitter .


More sparkle and shine can be found on this snowflake on the edge die, which has been die cut, inked and covered in glue and seal and rock candy distress glitter. I love the vintage fell this gives , as I have to admit sparkle and shine don't often appear in my pieces .


Onto the found relatives card I added some of the festive rub ons which have a white and black sheet, here I opted for the white.

I made some really soft coloured flowers using the poinsettia die and made these by cutting, colouring with distress stain in tattered rose, then spritzed, scrunched and left to dry over night. For that added vintage sparkle I added a new gumdrop.


at the top of the photo I added another smaller poinsettia, complete with sparkly gumdrop.


I also added some white snowflake rub ons to the background. This design is a large piece on mdf board but could so easily become a large and elegant vintage card.


I added some dyed seam binding and one of the new festive tokens to complete the piece.


So hope you like my festive sparkle and shine make ...make sure you pop across here for lots more inspiration from my DT team mates and there will be lots more throughout the month.
Hopefully you will find the time to join in the fun in our sparkle and shine theme and you could be one of the lucky ones and win £20 voucher for Susan's shop, or you could be lucky enough to have a guest design spot.