Just wanted to say ... thanks for taking the time to stop by, hope you enjoyed your visit.x

Wednesday 31 July 2013

dreamer of dreams for Frilly and Funkie DT

Well it is the second week of another two week challenge over at Frilly and Funkie and this week chosen by the lovely and talented Sue, who has chosen fold it.

So not being a great talent where card making is concerned and having already played once at making a domino book, I decided to play again. So here is my make: ( you may need a comfy chair and a cuppa!!)


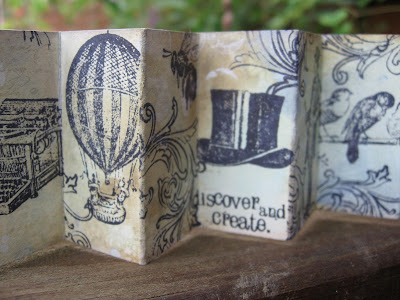
I started by creating the inside folded pages, by scoring and folding my card stock.When folded I added colour using.. distress inks in broken china and frayed burlap and then splots ( technical term of the super yummy distress paints...yes still loving these!)

 I then added script stamping using frayed burlap. Then onto all the main images, all using black archival ink. I masked each section of the book off so as to avoid getting ink on the next piece. This did take a while but hopefully you will feel was well worth the time taken to be careful. ( When  moving the masked piece remember Archival stays wet a little while and can get smudged if not dried off , also be careful not to transfer ink from the piece of masking paper)

I had such fun masking off parts of stamps to to get words from quotes that fitted as well as using Tiny things set from Tim Holtz, such a wealth of tiny images ...


The edges of the dominoes for the covers were covered with tissue tape...now for the front:


 I used an image stamped in black Archival, also a rub on, a gear and a light bulb wrapped in paper coated wire. The closure for this little folded book is also paper coated wire.


The back cover of the book was another small piece of stamped and inked card, with this fab hand (just love this stamp!) and a rub on.


 make sure you pop across to see the other fab DT makes and maybe pop in a folded make yourself.

The products I have used are listed below :


have a fun and inky day!
trace x 

Monday 29 July 2013

my Tim's Tag for July 2013 - always and forever

well again I am running late for this months tag, how do I do it! So a link to Tim's fab tag for July can be found here. I decided to go with my happy place of blues and browns and followed the steps of Tim's but with a few added bits and different colours. So here is my make :


I will leave all the details, to the crafty master himself here, but a few photos...I loved the brayed background and made quite a few, although this wasn't the best I somehow loved the colours so went with that...

I made my hearts in the same way as Tim did his die cut pieces..


 I do so love this technique...looks great in all sorts of colours!...some idea-ology...


 thanks for looking.

have a fun and inky day!
trace x 

Friday 26 July 2013

genius is 1% inspiration...for creative expressions DT

well it is time for another DT make for creative expressions using the doily die and also silver pearl texture paste....I decided to go steampunk, I know with a doily die...but it made great corners. so here is my make :


so can you spot where I used the doily die ?

I started by applying the texture paste through a gears stencil..and leaving to dry slightly, then I heated it with  my heat gun whcih gave it a fantastic pitted effect which looks great for this kind of make ..
I then used black soot and brushed pewter stains.


I then edged the tag with black soot distress ink. The image and quote are from Vintage Treasure and Vintage Inventor, do love this steampunk guy! I stamped in black archival and then coloured with black soot distress.

 
Hopefully you can see the great pitted texture in the background above.

To complete the tag...I die cut the doily and cut a small section, which I inked up and dipped in the stain to create the corner pieces..
 

.lots of my favourite stuff...idea-ology and some rub ons..


and then top top the tag off some fab paper coated wire I found in the garden section at Waitrose, which is super bendy and because it is covered in paper I could colour this black.

So make sure you pop across and see the other design team creations.

have a fun and inky day!
trace x

so good to have all three children at home, I love the holidays! xx

Wednesday 24 July 2013

you are the hero for dragons dream TIO DT

well another fortnight has flown by and it is time for another recipe over at dragons dream TIO, this time the lovely Helen has chosen the recipe...which is paint, ribbon and a mask or stencil. Remember you have to make a tag and use at least one real stamp.

So here is my make :


well my love affair with the distress paints continue, they make the most amazing backgrounds and come in all the yummy distress colours as well as being amazing when layered with distress...LOVE them! can you tell? So I created a painty background using the distress paints in frayed burlap and antique linen . ( before doing this I used gold pearl texture paste underneath through ledger stencil)


When I had dried the background out came the stencil again and I applied some walnut stain through the stencil . I also stamped a stamp from the paperboy boy set from Artistic Outpost ( love this set and finally got it inky...lots!) randomly over the background, using vintage photo. 

Then came the embellishing, I added quote from Paperboy set and cut it into pieces to place on the tag , placing one piece behind a fragment for definition.


 The image was stamped in coffee archival and inked with distress, a waterbrush used to remove colour from his face. I added some torn on the edge notebook die behind as in my card yesterday...

Finally some yummy idea-ology, film strip (LOVE this too!)


 and some seam binding/ ribbon dyed with distress stains.


well make sure you pop across here and see my team mates makes .

I am entering this for the following competitions:
 
choose a decade (1940's), twist and at least 3 layers  @ http://c2cu.blogspot.co.uk/

 
have a fun and inky day!
trace x
 
huge congratulations to Kate and William on the birth of their son, many happy memories to be had at this special time for them a s a couple!
 

Tuesday 23 July 2013

thanks you teachers..

well the time has come for the last day for the boys at school for this year and so I have actually made the cards for the teachers this year...as you know I am no card maker and for some reason find them a huge challenge...but wanted to create a card to say thanks...I also made bottle tags and will show you those later in the week.x

I am a huge admirer of Jenny , whose amazing blog can be found here and think these cards were subconsciously influenced by her effortless card making style, (think I have a way to go...but happy with these)

so here they are :

 
I started by applying some texture paste (studio 490 white ) to the card and then when dry set too with distress inks in frayed burlap, broken china and walnut stain. I added some ink through the stencil too..

Over the raised areas I swiped some treasure gold in white fire...

The main image is from paperboy Artistic Outpost set, love this set! Finally inked it up..more makes from this set soon.. I stamped it onto an ATC die cut using Tim holtz ATC die. I also cut the top edge using notebook on edge die.


Some inking, spritz and flick and removing colour from face using water brush finishes this make. Oh and some of the torn notebook peeping out from the image...

The sentiment is from Tim Holtz set.

I hope the boys are having a fun toy day, although know for James, it will be hard saying goodbye to his teacher who truly has gone above and beyond to look after James x

have a fun and inky day!
trace x  

Monday 22 July 2013

keeping it simple for Creative Expressions DT

well here is my second make for creative expressions using the couture creations doily die and silver pearl paste, and it is a card!
So here is my make for this week :


 I started by colouring my silver texture paste with some mushroom eco paint to allow it to blend in a little more and to soften the colours. I then applied it through tiny dots stencil and left to dry. When dry I applied antique linen, frayed burlap and vintage photo distress ink. I then over stamped the background with script stamp from a Creative Expressions set.

I cut the doily from ivory cardstock and then inked with the same distress ink colours .


 I decided to keep the card fairly simple and added a vintage image , which I bought on a sheet and scuffed and inked the edges, layering this over some cheesecloth. 


I also added a twirl of rusty wire and some flowers from floral trim, coloured using antique linen distress stain.

It will be a busy week for me post wise, hope you like my makes xx 

have a fun and inky day!
trace x 

Saturday 20 July 2013

Sneak peek for my Friday Focus...

This Friday Focus has been delayed due to the boutique being for a couple of days, it is now reopened and so pop across and see my Friday Focus xx

Well it is my turn for the Friday product focus over at Frilly and Funkie and I have been playing with the yummy texture fades....love these so pop across here to see....I did get  teensy bit carried away!

here are a few sneak peeks x


I hope you will have time to hop across here and see the rest of my makes.

I also want to say welcome to my new followers and thanks so much for taking the time to be part of my journey! Thanks also for all the lovely comments, which mean the world ..

have a fun and inky day!
trace x 


Wednesday 17 July 2013

summertime for frilly and funkie DT

well here I am with my Dt make for the challenge over at Frilly and Funkie and there is still a week to go...the theme is summertime, to be inspired by the theme, or colours of summertime..
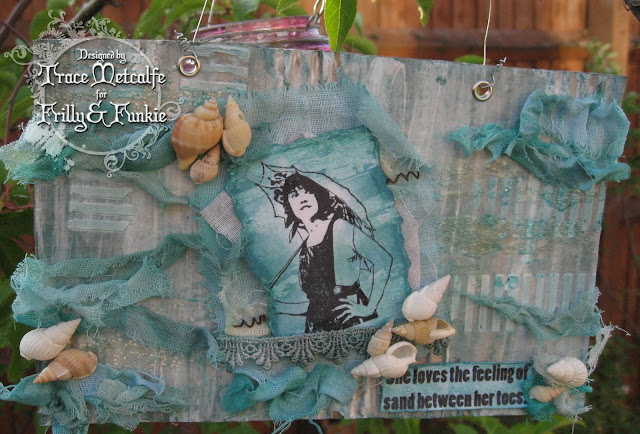
so here is my make inspired by the beautiful colours and textures of the ocean:


I wanted to capture the colours of the ocean and play wth lots of textures to create my finished hanging piece, using a piece of a box from some goodies...I Love using pieces of corrugated box that would just end up in the recycle bin otherwise! So I started by tearing a few patches of the top of the card off to reveal the bumps..and then a watered coat of gesso.

When dry I added stencilled detail with studio 490 white paste and then coloured with broken china distress ink...I left the white layer streaky to give a whitewashed feel.


Inspired by the lovely and very talented Jenny I decided my glass bead texture gel needed some playtime and wondered if it would mimic watery droplets? so I applied some in patches to add to the watery fell. I also streaked over the main image before inking and love the streaky watery effect it created! 


The main image is from the fab boardwalk set from Artistic Outpost, love this set which speedily winged its way from the lovely Lindas fab boutique. I stamped this image in black archival and after applying the glass bead gel, coloured with distress inks...removing the ink from her face using a water brush. I layered here on pieces of crinoline, coloured with distress stains.


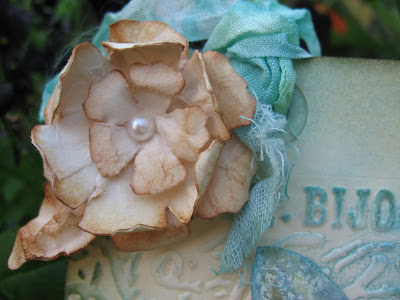
.I also added some shredded pieces, all coloured with distress stains and some pieces of coloured cheesecloth too...to create lots of layers...loving these shredded pieces...


I also added some great venise trim, dyed with distress stain,takes the colour so well. I went to town adding the shredded pieces and lots of seashells.. can you spot the sneaky rusty wire that slipped in!


Finally a sentiment also from the boardwalk stamp set..

make sure you pop across and see my fab team mates summer inspired makes, why don't you join in ...there is still time and  you could be picked as the top three or be the lucky random winner of $25 to spend at the fab Funkie Junkie Boutique.

See below for the products I have used

I am entering this for the following competitions:
 
going green (used recycled card from box) for Simon says @ http://simonsaysstampandshow.blogspot.co.uk/
build me up ( build up the layers ) for Sunday Stampers @ http://pinkleart.blogspot.co.uk/


...have a fun and inky day!
trace  x