Just wanted to say ... thanks for taking the time to stop by, hope you enjoyed your visit.x

Thursday, 11 August 2011

steampunk lady from the octopode factory meets wild orchid flowers..digi style

Well hey there bloggers and here is my first foray into digi stamps. I can't profess to understand all the tricks yet, I can't even resize........maybe I shouldn't admit that bit!
Anyway, here is my first ever digi meets stamping creation.

The digi stamp (steampunk violet) is  from the octopde factory, not that i'm hooked or anything!?
I printed her out and heat set the ink using my heat gun gently!
She was coloured using promarkers and some glossy accents added to a few of the watches in her hair...just can't live without it.

The background was made with my beloved distress inks, in black soot and pumice stone.Firstly, I stamped the large watch in pumice stone and then the smaller watch in black soot.Then I added some pumice stone around edges to soften look.Finally, I stamped the smaller watch again using silver adirondak paint dabber.

The stamps were from alice in wonderland sheets. The flowers are from wild orchid.

I am entering this into the octopode factory friday challenge girls, girls,girls:


Hope you like it,
thanks for looking,
 share the love and leave a comment
 it makes my day!
ta trace x

Tuesday, 9 August 2011

A quirky snowman from the octopode factory...too cute!!!

Well hey there bloggers,
Here I am with not one but two snowy offerings.I have just got this stamp from The Octopode Factory and am in love! He is quirky, cute and somehow fab all at once.
http://www.etsy.com/shop/TheOctopodeFactory
Anyway here he is:
The background of the tag was created using crackle accents for the snow, and tumbled glass for the backgorund. Once dry I added icicles using crackle accents and detail to blue using weathered wood distress ink.When dry dots of crackle accent were added and circles using bottles top and pearl acrylic paint from paint dabber.

The snowflakes were cut using a cricut, although snowflake punch would be great too. Finally the star of the show my little snowman chum, he was stamped and his body covered in glossy accents.Once dry, his scissors, scarf etc were coloured and he was attached.
 Finally, a strip of white cotton lace was added down side and ribbon added to top of tag.

Now for my second offering:


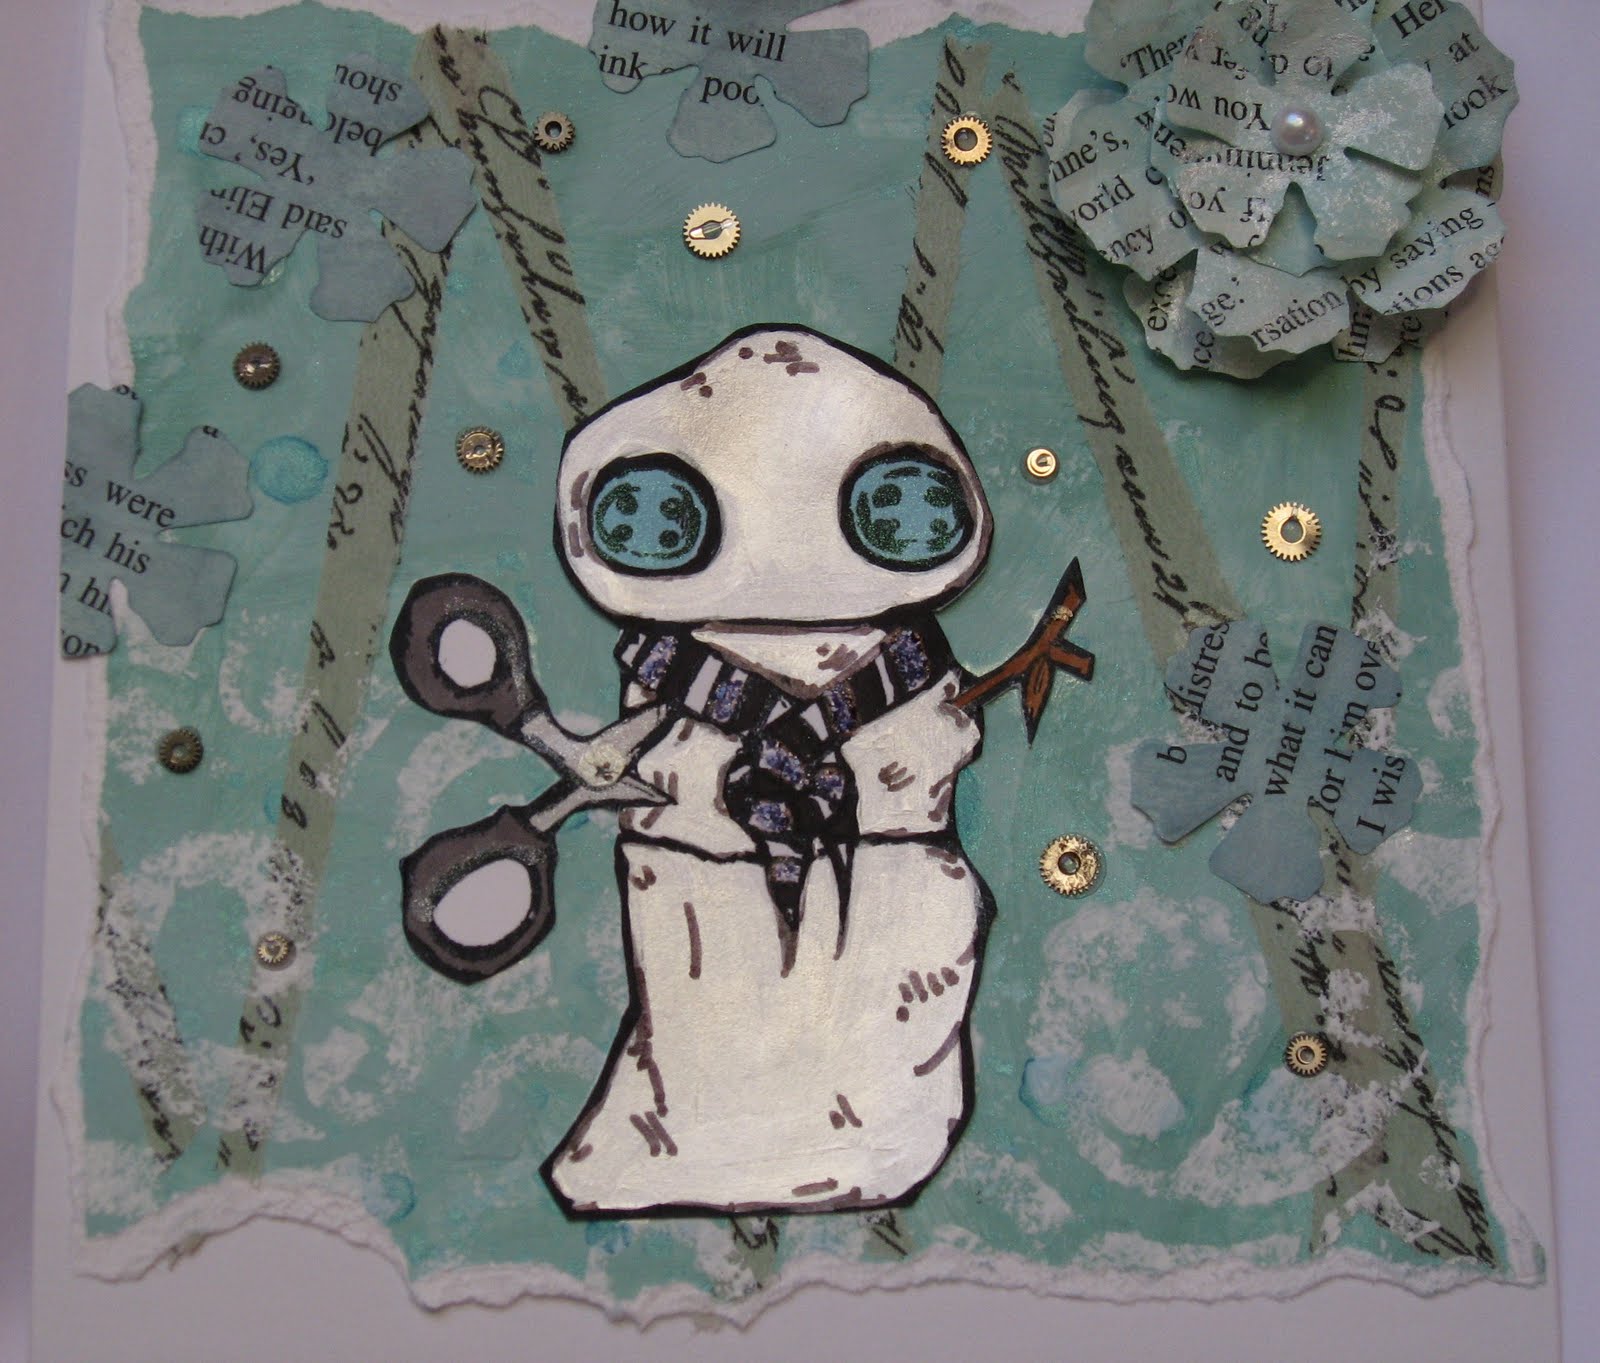
The background was created using Craftynotions multisurface paint, then white snowcap paint dabber was added through a swirl stencil once dry. Then strips of Tim Holtz tissue tape was torn and added. The
 flower was made using Tim Holtz Tattered floral die onto old book pages and coloured using
 tumbled glass distress ink.Once dry the cutie snowman was added, he was painted using pearl paint   dabber paint, applied with a brush and then the black detail re-added using a pen.Distress stickles
was added to the scarf.He was then glued on.

Finally, metal watch parts were added.

I have entered this card into the following competition:
Christmas in August.

thats all for now
share the love and leave a comment
ta trace x


Sunday, 7 August 2011

Bon voyage......no holiday though unfortunately!

Hey there bloggers and thanks again to all those lovely people who made my day and left a comment.
Thanks!
Thought I would share a card I made a while back and keep this post short and sweet, unusual for me I know!
So here it is-


And just before I go because I know my hubbie will read this later:
Thanks for all you do for me, you're a star, thanks for all the support you give me when my inkiness is well, far too inky and for the constant stream of crafty goodies you know I really NEED!love you x

Well thanks bloggers,
share the love and leave a comment
It really does make my day!
Ta trace x

Saturday, 6 August 2011

cogs and watch bits...and me

Well hey there bloggers and thank you to all those lovely people who made me feel FAB by leaving me a comment. Maybe you will be back?Anyway having missed out on a design post to much more experienced crafters I decided to re-eveluate my blog and be truer to myself, so here I am grunged up and ready to roll.
LOOK OUT WORLD ! HERE I COME!!!!!!!!!!!

This is my newest creation, cogs and more:


I first made the background of the card using alcohol inks (slate,mushroom and silver mixative) onto glossy cardstock and then softened the look using blending solution, applied using an alcohol inks applicator and felt.

The middle panel was made by embossing a piece of white cardstock using a Tim Holtz embossing folder - steampunk..This was then coloured using my absolute favourite distress ink,  antique linen and then pumice stone and in some areas black soot.


The cogs were cut out of grungepaper (another favourite!) using Tim Holtz die - gadget gears. They were then coloured using black soot distress ink.Three of them were then randomly splodged with Tim Holtz distress crackle paint - (brushed pewter) in a variety of depths and leaving some areas untouched.

The last cog was covered in glossy accents and then tiny watch pieces added and then when the glossy accents started to go cloudy another layer of glossy accents added to trap the watch parts inside.Hope this makes sense?!!!


Once dry the alcohol ink background was overstamped using cogs from creative expressions stamp plates, using archival ink, as stamping onto glossy cardstock.Make sure this is dry before glueing cogs on, using pinflair glue to achieve depth and dimension.

I am entering this for the following competition -
GC110: Gears, Cogs and Watch bits
http://www.gingersnapcreations.blogspot.com/

Well can't wait to share some more of my new found self soon.
share the love and leave a comment
thanks trace.x

Wednesday, 3 August 2011

tim and tags.........

Well hey there bloggers on a thundery evening.
I thought I would share with you a tag I made at about 6am thanks to my beautiful baby girl (of nearly 2) waking up between 5 and 6am then falling asleep leaving Mummy WIDE AWAKE! The boys were asleep so the crafty den called! Here is the tag I created, not bad for such an early foray into crafty things!

I will try and give you a quick, step by step guide to what I did, how I did it and what I used:I will give the instructions and then list the materials used..............hope that helps?!!
1, Firstly I stamped the text randomly over the tag (urban grunge set), using black distress ink. I set aside for a few seconds and then using blending tool added background colours (antique linen and tumbled glass).
 I did not wait long as I wanted the black soot to blend slightly and give softer look.
This was then overstamped with the birdcage(artful flight) using antique linen.

2.The bird and cgae and swirls were cut from grungepaper using elegant flourishes and caged bird dies. The bird was coloured using weathered wood distress ink applied using blending tool and then the text was stamped randomly using first brushed corduroy and then a silver acrylic paint dabber.
 The flourishes were also coloured using the silver paint dabber.
The cage was coloured using brushed corduroy, set aside to dry and then black soot added in patches.

When dry I added crystals to the top and along the bottom.

3. Once dry I attached the bird to the tag using glossy accents and then attached the birdcage, with a slight curve in the centre.The flourishes were attached on the corners using glossy accent and the remainder cut off when dried and kept for another project!

4.Finally, I added some crystals to the other corners in reducing size, added some vintage cream ribbon to the top........... and the tag was finished.

Materials:
blank tag
grungepaper
distress inks - tumbled glass, weathered wood, antique linen, brushed corduroy and black soot.
silver acrylic paint dabber
Tim Holtz alteration dies - caged bird, elegant flourishes
Tim Holtz urban grunge stamps, stampers anonymous Tim Holtz Artful Flight
Crystals
vintage cream ribbon - creative expressions
Tim Holtz blending tool
Glossy accents

I am entering this for the following competitions:
http://www.studiol3.blogspot.com/ - tim holtz grungy monday

share the love and leave a comment
ta trace x


Tuesday, 2 August 2011

Flutterby Wednesday challenge.......

Here is a card , again for a challenge, think I am hooked!

This card had to have a fairy,butterfly or angel and stripes. I don't often use stripes so found stripey paper too much for me. I decided to use a tim holtz alterations embossing folder to create rays/ stripes instead.
So, here it is:


I started by embossing a panel of coredinations card with the tim holtz die, this paper was black on one side and a beautiful blue on the other. I then sanded back the embossing to reveal the core colour of the card..........making blue stripes.
To coordinate the backing perfectly, as it is sometimes hard to get a true colour match, I used the reverse of the card for the backing of the other side of the card and stamped the corners of this using a rhonna farrer flourish. To make the joint flush I added some coordinating ribbon.
Lastly, my beautiful fairy, from lili of the valley. I cut out a circle using my trusty spellbinders die, stamped the fairy in black memento and coloured using the fantastic cosmic shimmer acrylic drawing inks.(blue blush,silver sheen,pearl shine,black night and cosmic skin).
Once dry I edged the circle using broken china distress ink and added some crystal stickles to highlight her wings.


So I am entering this card in the foloowing challenge:
a fairy and stripes - http://www.flutterbywednesdays.blogspot.com/

Hope you like it, thats all for now
share the love and leave a comment
ta trace x

Monday, 1 August 2011

serene in the snow..

Hi there bloggers
Just a quick post tonight, I have made a card for two competitions and I have tried really hard to keep it basic. Sometimes I like the elegance of a pure and simple card with limited techniques and feel this card has a gentle and serene, almost soft feel.

I am entering this card for the following challenges:
Totally gorguss Christmas in July -challenge 91 - http://www.totallygorjuss.blogspot.com/
and
I love ProMarkers - challenge 76 -  http://www.ilovepromarkers.blogspot.com/

share the love and leave a comment.
 ta trace x