Just wanted to say ... thanks for taking the time to stop by, hope you enjoyed your visit.x

Showing posts with label alcohol inks. Show all posts

Thursday, 3 July 2014

Go with your heart - Dt piece for CountryViewCrafts .

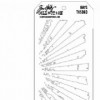
Well all this month over at CountryViewCrafts challenge blog the theme is stencil it and here is my second piece for the month using lots of fab Tim Holtz layering stencils and much more to create my piece . Now usually when I think of stencil it is paste and inks and paints...but I wanted to do something a little different. Ever since Creativity Chemistry 102 ( a great online course by the man himself Mr Tim Holtz ) I have been determined to get my dusty alcohol inks of the shelf for more of a play...so here they are using a technique from the course.
So for this I made a layered tag...and used stencils with alcohol ink to create faux bleach effect and also with some paste to create texture on the base layer...here's how :
I started by creating the base on my tag by applying texture paste through Tims layering stencil..latticework ...a real favourite of mine..and left to dry.
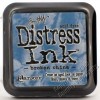
Then when dry I applied rusty hinge and broken china Distress Inks using a blending tool, drying and layering colour until happy ....just love these colours together! When dry I edged the whole tag in rusty hinge and set aside. Just around edges to make colours stand out I added some black soot distress ink.
Now for the alcohol inky bit...
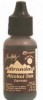
So to start I selected some blues and browny colours and applied some to my blending tool with alcohol ink felt applied instead of foam. I took a piece of alcohol ink card but lots of glossy card works well. I then applied the colours to my card twisting and turning the tool. I left to dry for a few seconds and then added some more to blend colours and tone down areas that I felt were too dark.
Now for the really cool bit...I took a clean piece of felt and applied some alcohol ink blending solution to the felt, placed my layering stencil ( I chose rays ) over the background and dabbed the solution through....waited for a few moments for the magic to happen and removed the stencil.
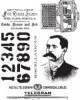
I then trimmed and tore across the bottom ..all ready for the fab man image from Purveyor set. I cleaned my stencil using an alcohol wipe as this removes all residue from blending solution. everytime I play with alcohol inks I wonder why I don't use them more! Do you have things like that?
So here are  some close ups of the details.
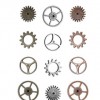
I inked the edges of the piece in rusty hinge and black, then stamped the main image using jet black archival and heat set it . I added to the tag and added a rub on and some cogs...well you know me and cogs!
To finish the bottom of the tag , some more rubs ons...a word band threaded on rusty wire and stapled and yes.. more cogs...a girl can never have too many cogs!
The top was finished off with some seam binding dyed with rusty hinge and broken china distress stain and I added a spinner on the left.
So hope you like my stencilled tag and hope you will have time to join in with the stencil it challenge over at Country View Crafts challenge blog here .
Thanks for stopping by and taking the time to leave a comment....so great to be back and inky!

As I am getting back into blogland I have decided to enter this tag for the following :
tags @ TryitonTuesday
keep those fingers inky and those hearts full!
trace x

Tuesday, 30 April 2013

anyone for domino's? - inspired by Brenda


well this is another make that has been sat patiently waiting to be blogged and this piece was inspired by the lovely Brenda , whose wonderful blog can be found here . It is full of lots of yummy creations , so make sure you take a look! So here is my domino book , inspired by the lovely Brenda:


Well it had to be brown and have cogs didn't it!!!
So lots of pics..sorry...

I used a combination of lots of Sam Pooles stamps for Creative Expressions...vintage Inventor, Vintage treasures and Vintage Illusion...love these sets... I also used some fab Tim Holtz ones and My favourite hand and steampunk gents!


I used all my favourite inks, in yummy distress colours, Distress paints, background stamps from Creative Expressions...and Archival ink to create all the stamped layers inside..


Then on the front my favourite mini gears and some of the fab new Rub ons from Tim Holtz...loving these! Oh and  a few Prima cogs that fell in my basket the other week! oops!


Thanks Brenda, I would never have tried this without your inspiration...


welcome to my new followers and thanks too everyone for all their kind comments here and on facebook, they are all truly appreciated!

have a fun and inky one!
trace x

Tuesday, 20 November 2012

meet Bertie.....

well the posts are coming thick and fast
...as i try hard to catch up with the funkie junkies twelve tags of 2012......
and blog Dt makes.......
and some of my creations ....
 
so without further ado....
meet Bertie...
 
 
what do yo think?
he has been a long time in the thinking about....
and a while sat unfeathered..
but finally Bertie has wings to fly!
 
 
i covered a paper mache bird with bronze paint
cut lots of my favourite Tim cogs from foil
and covered Bertie..
these were then coloured with alcohol inks
 
 
when dry i added lots of fab idea-ology mini cogs
snaps and cogs
with mini screw brads...
ssshh...don't tell him he has cogs for eyes!
 
my new addition to crafty stash rusty wire ...
that i love...was used and a rusty bell
around his neck..
 
so i can find him if he flies off!!!!
 
 
and finally shake those tail feathers....
some rusty wire curled and shaped for feathers...
 
 
and finally..
rusty wire feet............
 
well i am rather fond of Bertie...let me know what you think?!
 
have a fun and inky day!
 
i am enetring this for the following competitions:

use two or more punches or die cuts @ http://craftycardmakers.blogspot.co.uk/

Saturday, 6 October 2012

playing with patchwork

hey there , well in a desperate attempt to get my blogging back to normal...,
here is a tag i made .
.using my favourite technique of the moment,
riveted patchwork..
which can be found in Tim s fab book Compendium of Curiosities vol2..
so here is my tag:


I started by creating the background of the tag and used aluminium DIY tape for this,
coloured with orange tone alcohol inks...
which i did not buff off very much..
I added some garden wire, cut to shape, using my fab mini attacher!
 and staples!!


then i cut lots of flowers and leaves from the tattered floral strip die..
which is stacked with flowers ad leaves...
these were cut fro DIY tape and coloured with alcohol inks..
 
i then layered them up, adding a brad for the centre..
the finishing touch, some ribbon
coloured with silver metallic distress stain.


I am entering this for the following competitions:

leaves @ http://simonsaysstampandshow.blogspot.co.uk/2012/10/challenge-leaf-spiration.html
fall colours @ http://craftycreationschallenges.blogspot.co.uk/
lots of layers @ http://tuesdaytaggers.blogspot.co.uk/
tag @ http://everybody-art-challenge.blogspot.co.uk/

have a fun and inkyday!

Saturday, 22 September 2012

tape it up..steampunk style

well it is challenge time over at Simon says again..
 i missed it last week
 and am nearly too late this week!!!
so the theme is tape it up..
and here is my taped up creation..inspired by a magazine article by Sarah..
 
 
i used DIY aluminium foil tape,
added lots of cogs and steampunk yumminess..
and then coloured the tape with alcohol inks..

 
inside the space
i added some wire
coloured with alcohol inks...
cogs cut, embossed and coloured


and a heart and wings..
well i had to didn't i?!
and the heart been rust treated ...
a fab Andy Skinner technique

 
 and lots of idea-ology!
I have had a ball making this!!!!

 
i am entering this for the following competitions:
 
 
have a fun and inky day!