Just wanted to say ... thanks for taking the time to stop by, hope you enjoyed your visit.x

Showing posts with label art parts. Show all posts

Saturday, 28 September 2013

sneak peek for Saturday step X step over at Frilly and Funkie

Well It is my turn for a Saturday Step X Step and I thought I would show you a piece made with some Art Parts and some Clearly for Art , that hasn't been out to play for a while.

so here is my sneak peak....make sure you hop across to Frilly and Funkie to see the whole piece and the Step X step  of how to make it x

 
have a fun and inky day!
Trace  x


Wednesday, 3 July 2013

Wendy inspired for Frilly and Funkie DT

Well it is half way through the Wendy Vecchi inspired challenge over at Frilly and Funkie and so time for the funkie team to share their makes....this does not mean you have to use Wendy Vecchi products to join in, you could just be inspired by some of her amazing style...here is a link to her blog...for oodles of inspiration. So here is my Wendy inspired make :

 
For this make I used lots of the fab art parts which are compressed paper and very sturdy...this is a spool set and fab inspiration for these can also be found from huge talent and Wendy fan Hels..who makes lots of these and plenty of other Wendy pieces. Hels fills her with lots of yummy things and oodles of colour..me well I went for the comfort of my neutrals..

Art parts can be inked or covered in paper and sanding the edges when covered gives a super neat finish as well as a touch of ink to the edges...they can also be inked painted and lots more!


The butterfly and the flowers are from Wendy Vecchi stamp sets and cut from grungepaper which gives them shapeability and sturdier..plus it feels great! 


 For the spool set I covered in Tim Holtz paper from , sanded edges and inked with distress ink.For the leaves I covered in distress paint and over stamped with Wendy Vecchi script stamp. In the middle of the spool I upturned a mini bottle to keep the wire in! Well there had to be wire!

The flowers were stamped on the reverse of the grungepaper to avoid inky lines around edge, some were covered with distress ink and some paper and then edged with distress...couldn't help but add some cogs!!


well thanks for stopping by all supplies listed below and Linda has a 10% sale and all ranger products are already 20% off so a great time to have a sneaky peak and stock up..
have a fun and inky day !
 trace x 

Sunday, 28 April 2013

a heart a day keeps bad things at bay...

well , I know naff title! but here is my very speedy hearty make for today. I made this small hanging , just because and here it is :

 
I started by painting a small art part and then layering texture paste through my favourite script stencil, when dry I applied gesso across it. Then when dry I applied ....yes you have guessed weathered wood, broken china and frayed burlap.


Then I swiped across with white fire treasure gold, oh and some dark treasure gold too.

The heart was cut from white cardstock and stuck to a smaller corrugated card heart behind to strengthen and thicken it. I then applied 2 step deco art crackle glaze. When dry I inked and added some treasure gold.


Some rusty wire and a chit chat sticker, oh and some wings....(no self respecting heart should be without them!) completes the make.

have a fun and inky one!
trace x

Friday, 22 February 2013

home is where the heart is for creative expressions DT

well , slowly , typing one handed and being a good girl and resting my hand.. is my post for creative expressions DT using the fab 
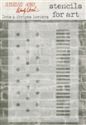
arthouses set designed by the lovely Sam Poole.

These stamps are fab and can be used for so many things and luckily I got playing before I was told to be good and rest my hand for at least 3 weeks, well day one done..itching to get inky already..may give it a one handed go!?

Anyway here is my make this week:

 
 I made this at the weekend and couldn't believe it when I saw the fab Butterfly had made a similar thing!
I started with some beer mats which I painted , then added furniture restorers crackle medium and a layer of calico emulsion. When dry I edged with 
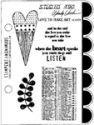
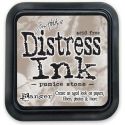
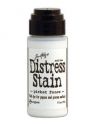
vintage photo distress ink and stamped some script from timeless journey set in vintage photo and also added some bubble wrap stamp using pebble paint dabber.


Then is set about decorating....

the first piece, had the word home cut out and inked, this was from the word play die but creative expressions have a fab grungeboard letters in sets here.

For the middle section:


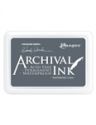
I used the fab house set and stamped the house in coffee archival, then I inked and used a waterbrush using distress inks. I added 
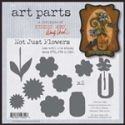
glossy accents to the centre piece, and also added some great arts parts wings, coloured with 
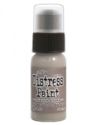
vintage photo distress stain.


now for the last section:


I used a technique from one of tim's tags last year found here, I used a grungeboard heart from this set and covered with wonder tape sheet..( this is sticky on both sides but will also cope with being heated..
 I then stamped out the house in archival and coloured the text pieces with vintage photo distress and snipped up into small pieces which I added to the heart shape. when happy I added a mix of walnut stain, tea dye and vintage photo distress embossing powders to it and heated. then added glossy accents to the pieces.
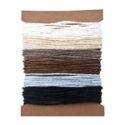
to complete I added mini stamped words and some rusty wire..of course!


I added rusty wire to the top and used idea-ology lace chain to connect the mats together..
These were blank beer mats , but you could use any thing really..

I love how you can use pieces of the stamps in different  ways, the two pieces I have done have been browns but will be back next week with something more colourful, using these stamps.

thanks for stopping by............have a fun and inky day!

Sunday, 17 February 2013

a distressing messy time..

well,  a while ago I ordered an early birthday present ( thankfully that milestone has been and gone! ) of some goodies from the lovely Linda at the Funkie Junkie boutique, among them ( yes i was naughty stamps and sprays fell in too!) were the set of fab new distress paints..and guess what they arrived yesterday, so despite a very bad hand hindering my messy play... it seemed rude not to play!
( long story but I went through the door and my left hand decided to stay in the handle..not pretty!! and rather sore! ) - so if I haven't visited I am trying to catch up slowly!!

So as typing is difficult, short and sweet here are the first play results with these fab and I mean yummy scrummy paints..yes I love them!!!


I started by applying weathered wood, antique linen, frayed burlap and broken china paints to a canvas..then spritzing and drying and  generally having a ball! Then when dry I edged with vintage photo DI, spritzed and dried and then added some more weathered wood through sequin waste and brushed around the edges.


Then I added some ferro texture taste through sequin waste and heated so it puffs up and dries! cool eh?! Then I brushed some weathered wood across the raised areas.


I think as much as loving the paints its that they are in the yummy distress palette..
So then I added a heart art part which had been painted with weathered wood, and texture paste added through script stencil. I then painted over and when dry edged with vintage phtoto DI.


To complete the canvas I added a flower I made for my Saturday stepXstep using ranger foil..details here and covered in the paint..love the matte look, some rusty wire twirls and also some rusty wings using an Andy Skinner Timeworn technique.


Sorry its a rush.. but my hand has had enough..

I will be round to catch up with all my followers and friends later when hand has had a rest!

I am entering this for the following competitions:
something messy @ http://simonsaysstampandshow.blogspot.co.uk/
love is all around @ http://happydazedesignteam.blogspot.co.uk/2013/02/february-challenge-love-is-all-around.html
just two colours @ http://panpasteluk.blogspot.co.uk/


have a fun and inky one!