Just wanted to say ... thanks for taking the time to stop by, hope you enjoyed your visit.x

Showing posts with label tag. Show all posts

Wednesday, 2 August 2017

haunting melodies for Country View Crafts

Well it has been a while but ...it is what it is .... at the moment as life is rather busy and leaves little time for craftiness ...

 but too long a story for now ..

 so here is my make for today .. all details will be over on Country View Crafts blog and can be found here :

So here is my make ..full of some of the yummy new goodies from Tim Holtz .


all the details can be found over at 

hope to see you soon

trace x

Tuesday, 25 April 2017

Make this journey your own.

So life here is busy, busy but I made this tag couple of weeks ago and have found a snippet of time to blog it ...so here it is :


I am still so in love with the new distress oxides and enjoying my playtime with them and eagerly awaiting news to see if more colours will be coming...I do hope so!

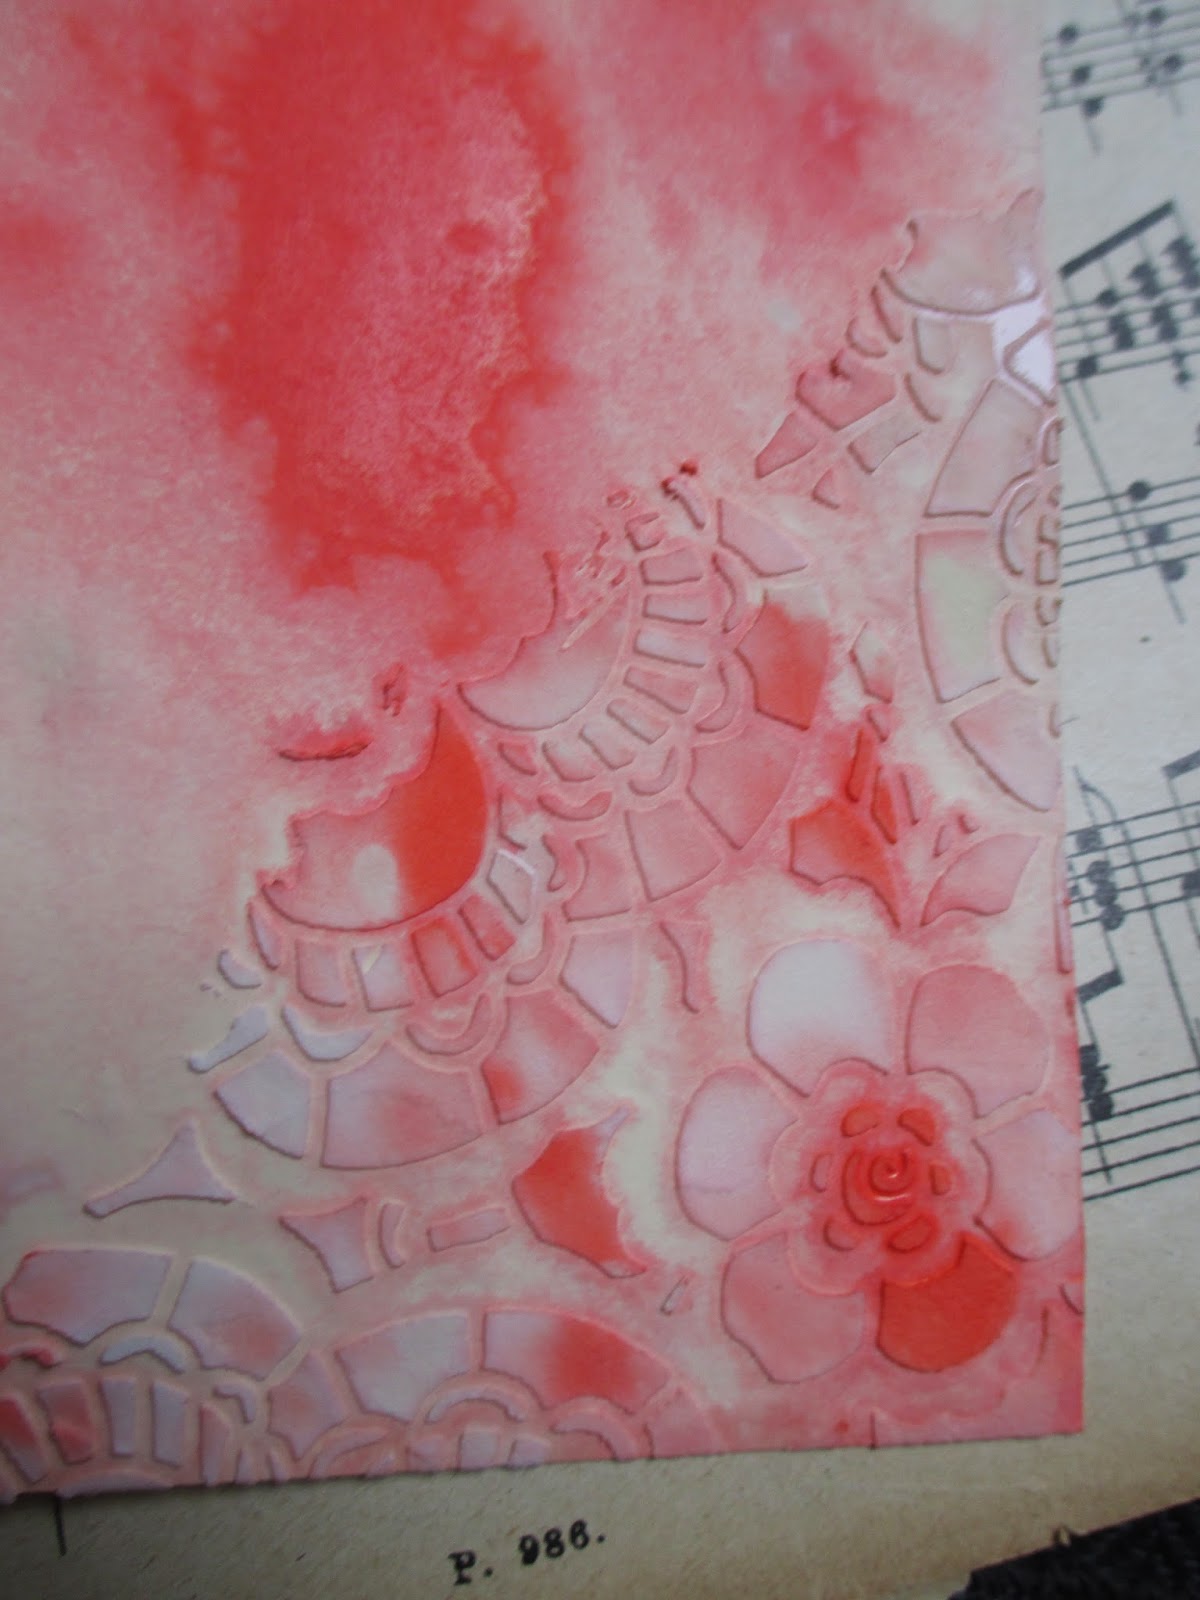
So for the background on this tag I used iced spruce and vintage photo..


For the background of the tag I applied these straight to the tag and spritzed and layered ... I also created another piece , to use to die cut from  using walnut stain distress oxide and distress ink and iced spruce distress oxide , applied to craft sheet , spritzed and dipped into..


I just love the gorgeous textures and drops of colour this creates ...I edged the tag in walnut stain distress ink


I then placed a stencil on - Tim Holtz chevron 024 and applied some water through using blending foam which removes some of the colour and dried and added some journey and vintage tape from the new sets ...


I due cut the houses using metropolis thinlits from Tim Holtz...using the pre-prepared piece of card and inked edges using ground espresso distress ink.


Now for the details...I added these onto the base layering some on 3-d foam to create depth ...a clippings sticker, cut and edged with ink, some dyed seam binding, rub ons and plenty of my much loved idea-ology..


I cant get enough of the film strip and mini attacher staples.. for that added detail..


and here are the fab die cuts with all those inky splatters..and a bit of rusty wire ..


So hope you like my make , a simple playtime tag full of Tim Holtz yumminess!


So I am off for some more GCSE maths lessons to sort ,, among other things ..
whatever your day brings hope its a good one ..

trace 
x


Sunday, 16 April 2017

Hippity Hoppity for Country View Crafts

So here I am today with a sneaky peak of my post over at Country View Crafts, using lots of distress oxides and yummy Tim holtz goodies..

all the details of how I made these can be found here ..


Here are a few close ups of the details of the orange card..all details over at Country View Crafts here..


and the green toned one ..

I also made some matching tags , minus the paste in the same way ...


And people are always asking how I use my tags ...so here is how...this was part of an Easter gift for my Mum and Dad...and I think the tag looks so much nicer than a bottle bag...


so there you have my Easter makes

I would like to enter my Easter makes over at Simon Says where the challenge is hip hop -

Have a Happy Easter

trace x

Tuesday, 4 April 2017

Hello my Darling


So it has been a while but here is a tag I created using one of my vintage photos, texture paste and also plenty of distress crayons. 

I love this vintage photo and for some reason it make me think of my Grandad ...


I started by adding texture paste through a selection of Tim Holtz stencils. When dry I added a layer of collage medium so give a great surface to use the distress crayons on...


I then selected some collage elements to use on the tag. I inked the edges and also selected some idea-ology and a die cut heart that I inked and spritzed.


I placed them onto the tag to decide where to place them and added some collage medium and then some distress crayons..


And here is the finished tag ...I added some dyed seam binding, some staples from the mini attacher


I added the heart and word band at the bottom of the tag


I just love this photo and hope I have done it justice ...


here are a few of the details...

So there is my make ... a vintage coloured tag inspired by a vintage photo..

I would like to add this over at a Vintage Journey - where they are offering that you can add a tag for tag Friday.
I would also like to add it to Go Tag Thursday - where the theme is vintage.


trace x

Friday, 27 January 2017

See possibility everywhere

Well this tag was made a long while ago but has just never seen its day ...so I thought...why not...

This was made with lots of inky layers of distress and plenty of Tim Holtz goodness, I may dabble with lots of other things but somehow my heart always leads me home to my inks...they just make me happy .


This layered tag has been made with a large tag and a small one layered on top, some texture paste and resist stamping for the base layer...


And for the details, some die cut gears (Tim Holtz thinlits) made a little rusty...along with plenty of yummy idea-ology...


some dyed seam binding tied at the top ...and a hint of rusty wire....and a splash of idea-ology ...well maybe a few splashes!


so it still feels a bit weird being back in blogland and it my be sporadic at times  but it is a start ...


and I would like to enter it into the following ..


so that is all for today ..
trace x

Friday, 27 March 2015

Happy is as happy does !

I have spent lots of time playing....and just making for me and for pleasure...and here is a tag made to play with abandoned coral... When I saw this colour it wasn't one that I thought was very me ..but I have to say I like it ...
I started with a tag and applied some texture paste through this fab floral stencil from the crafty master Tim Holtz no less!

I then smooshed (technical term!) some distress paint in antique linen, picket fence and abandoned coral onto the craft sheet, spritzed with water and then swiped my tag through and plenty more spritzing!


 I just love those gorgeous marbled colours!


I dried with mt heat tool and ended up with this scrummy background... and its not brown!!!


I scuffed the edges of the tag and then added walnut stain distress ink which looks good with anything!


Now to get playing and adding the detail... I am loving collaging elements and have realised that my stamps have been somewhat neglected...but they will be back


I tend to collect lots of pieces and fiddle about until I am happy and only glue / staple on at the last minute when I am happy. As you know I have a bit of  thing for vintage photos , especially found relatives and the new photo booth and this one seemed to call out to go here...plenty of other Tim Holtz goodies too x


And finally to finish one of Tim Holtz handwritten sentiments on a journaling tag to the bottom...


To tie off the top I added some dyed seam binding using leftover paint from my kraft sheet.


Well hope you like my make...I will be a happy Mummy today as Oliver has been away all week and we have all missed him so much...cannot wait to get my hands on him! I am so proud of him and seems like they have had an action packed and fun filled week but will be so glad to have him home ...so will James and Lucy who have missed him loads...well and daddy too !


Sunday, 10 August 2014

busy blowing bubbles

Well here I am with a tag, this was used for the teachers wine bottles...to say thanks for all they have done...I love making tags to go round bottles they just seem a perfect fit...This year there were rather a lot to make so I think all in all I made 7 of these!
I wanted a fairly simple but pretty tag to make as I had to make a few...something I never really do as I like to create one offs but with 10 cards and 8 tags to create I had to get smart! especially as I didn't have oodles of time....
I started by creating the background  by applying Wendy vecchi crackle paste through one of Tim's layering stencils in various places. 

When it had worked its magic, I added some tumbled glass distress ink.

I then added some more distress ink to the background and flicked some water across the surface, drying to leave a great effect. I do love my distress inks!

I die cut some of the framework trellis die and dipped into some stain, which I had applied to my craft sheet. and left to dry. adding some ink when dry.

To add some more detail to the tag I added some colours of blue and green distress markers to the background using distress marker spritzer.... which creates a really cool effect!

Here is a close up of some of that spritzing.. I just love building up those layers x

 
I then added some inked bubbles using mini blending tool and distress ink.

Then I edged the background with distress ink and this picture shows what a difference this makes to the finished piece .

I then added pieces of the trellis die...

For the blueprint, I stamped in jet black archival and cut out and edged using tonic distressing tool, then dipped into stain from craft sheet.


I then edged with distress ink and edged with distress..adding colour to the main image using distress markers and my waterbrush.

 I added some dyed seam binding for the sea...

And finally some small sea shells and one of those super cool and super useful hashtags!

Well that's all for today...hopefully when you read this we will be enjoying some Cornish sunshine and sea air x