Just wanted to say ... thanks for taking the time to stop by, hope you enjoyed your visit.x

Showing posts with label distress stains. Show all posts

Friday, 25 July 2014

Stain is the name of the game

Well it is time for another theme over at A Vintage Journey... chosen by the lovely and talented Jenny. The theme is Distress Stains...so whatever you want to create using stains...and you need to say how Tim Holtz inspired your creation... So here is my make using stains in lots of different ways :


I decided to go all out with the stains for stamping, ribbon staining, background making and shattered stains... so here are some details and pictures .

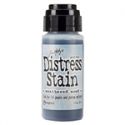
I stared by creating the background by applying Distress stains in rusty hinge and broken china to my craft sheet, spritzing my large tag and swiping through the stains... I spritzed some water onto tag surface and dried.

Then I re dipped into the remaining stain droplets to get a more mottled effect and dried.


then to add some detail I swiped stain across my flourish stamp....


and stamped onto surface of the tag in bottom left and top right.


To complete the tag background I added some rusty hinge and broken china distress ink to edges, dried and then edged with walnut stain. I added some die cut framework pieces and some  inside pieces cut from various materials. ( sorry got carried away but here is one that shows the pieces in place ).


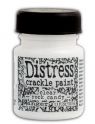
Now for the butterfly, well my new die (oops dies)...had fallen through my letterbox...well actually a few more things fell in my basket and Mr Postie had to hand them in the door...but anyway it seemed rude not to play..so I die cut the butterfly from grungepaper and coated with clear rock candy and left to do its thing!


I then added a layer of tumbled glass stain and heat set... Tim Holtz has a great tutorial on shattered stains here for his July tag.... I did this a bit differently but not much...


When dry I added more stain in broken china, dried and then using a brush added some rusty hinge to body area an wing tips. I also flicked some perfect pearl diluted powder on for a bit of shimmer in areas.


I added a sentiment, stamped in black archival and inked up in same colours and lots of dyed seam binding....using distress stains applied to craft sheet, spritz seam binding...dip into stain droplets and scrunch and leave over night to dry.


Finally a philosophy token with distress paint rubbed over surface and into letters and then rubbed off with soft cloth so paint only stays in letters.


Well hope you like my make and make sure you hop across for all the details of how to join in and to see all the yummy makes my fellow creative guides have made...I promise you will not be disappointed x

keep those fingers inky and those hearts full x
trace x 

Sunday, 15 December 2013

A time for peace

Well here is my offering for Linda's fab 12 tags of Christmas, where phew ...the deadline is now 8th January to include two more bonus tags ... Now this tag was made whilst my thoughts were elsewhere and I wanted to try and capture a serene and peaceful feel to my tag...

On the 9th December my Grandad , whom I loved so very much was at last at peace...and was very much in my thoughts when I made this .... (So may your star shine brightly and may you be at peace .xx ). 

So without further ado here is Linda's gorgeous tag and here is mine, I have changed the colour palette but stayed fairly true to the main elements of the layout :


I started by creating my background using pumice stone and brushed pewter distress stain and dabbing around until happy. then in some places I stamped some small music in places using the brushed pewter distress stain.


I then stamped the Angel in black soot as Linda had placed her..and I edged the tag in silver embossing powder and also added this great flourish at the top and bottom (from reindeer flight stamp set).


For the noel, I cut from greyboard and coloured using the brushed pewter distress stain, then added a layer of glossy accents, when totally dry I added a few bits of the flourish element and embossed with silver..


So for the flower I coloured with distress stain , from craft sheet and added a star for the centre to tie in the small stars on the tag..I also stamped over petals with music.


I also added a frosted snowflake, using distress glitter , no surprise there then!, some twirls of silver wire and a couple of leaves overstamped and embossed with silver.


so hope you like my tag...I am linking this up to Linda's fab twelve tags ...all the details are here..and it is generously sponsored by the funkiejunkie boutique, Linda's wonderful cavern of crafty yumminess!


(may your star shine brightly and peacefully)


Keep those fingers inky!
trace x 

Saturday, 27 April 2013

inspired by Jenny aka Buttons......

Well here I am today with a make I made a while back inspired by the lovely Jenny aka Buttons, whose wonderful blog can be found here. The techniques I used here are inspired by this post here, the Friday Focus for Frilly and Funkie. There is lots of great Friday Focus projects that focus on all sorts of different products and some great inspiration. So this one is inspired by Jenny :


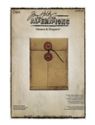
I started by using all the techniques detailed by Jenny on some card . I then cut this up to cover the pocket envelope. I love how this highlights the textures. make sure you pop here for all the details.


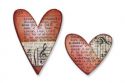
I love hearts and so I added a heart cut using the movers and shapers heart die and then added ink and a good coating of rock candy. Some wings, a twirl of wire and a chit chat sticker and the envelope is finished.


To place inside the pocket envelope I made an atc in coordinating colours using the distress paints and some small pieces of the paper used to cover the envelope.


This heart was again cut from the movers and shapers die and has wings and wire, but was covered with texture paste through sequin waste  and then coloured with inks . the background was done using distress paints .


 thanks for stopping by
have a fun and inky day!
trace x


Tuesday, 26 March 2013

if you had wings where would you fly..Creative Expressions Dt make

well the posts are going to be thick and fast this week sorry.. but here I am again with another make using the fab dress form designed by Sam Poole. This is a great and versatile stamp from the new single stamp range ..my first make with this stamp can be found here and now here is my second:


I created a heart hanging piece this time in my favourite brown shades. So I started using the wendy vecchi heart stencil as a template for the heart shape and enlarged it to create two stacking heart shapes. For the outer heart shape I covered it in book pages and then coated with a mix of watered down gesso and sand eco paint to create a great soft off white colour .

I then inked this heart with vintage photo distress ink and edged in walnut stain..using a watered down version of the paint allows some of the text to show through the paint and inky layers.

The second smaller heart was covered with studio 490 embossing paste in white through the great mechanical mask. I coated this with the same painty mixture and then when dry applied distress ink and spritzed with water to create some lighter details..


I then used a small amount of bronze eco paint to highlight some of the texture of the embossing paste.


The dressform itself was stamped twice in coffee archival and the first created the base layer and then I cut out the wings and added to create dimension. all had some soft colour added using distress stains and a waterbrush.

 
I added a mini gear and some rusty wire..had too didn't I? I also used this rusty wire to hang the hanging..if that makes sense. Finally the sentiment .. if I had wings from art sayings.


Well hope you liked my make , will be back tomorrow with two more dt posts and another one on Thursday!

have a fun and inky day
trace x

Thursday, 7 March 2013

some arty houses for creative expressions dt

well here I am again with another make for creative expressions  from the fab art houses set of stamps designed by Sam Poole. I have loved using these stamps they are so versatile for all sorts of projects and pop here for more fab Dt inspiration links.

So today I thought I would make a card, I know a proper grown up card! So here is my make :


as you know I love browns and blues together and also am hooked on splatting ( technical term ) my distress stains .. that and tissue tape which is another favourite of mine .. oh and some rusty wire crept in...couldn't help it!

So I started by colouring the base of the card with splats using my distress stain, broken china..such a yummy blue! then dried with heat tool.

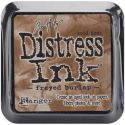
I then applied ink using blending tool in broken china and frayed burlap and edged with walnut stain.

I also coloured another piece of card using the same method but added some frayed burlap splats too. When dry I stamped the great house image twice using black archival. I added some detail using distress markers and a waterbrush. 


 Then sentiment was stamped in walnut stain and cut into strips to fit card design and edged with walnut stain .
The hearts are cut and then coloured using same distress inks and I added some tape and some rusty wire.


I also added some tissue tape onto the card. I realised I do not make cards enough!

Hope you have liked my make , all supplies available from creative expressions liked above.

have a fun and inky day!
 
hugs trace  x

Friday, 1 March 2013

countryviewcrafts new challenge blog...and exciting news.

well here i am to announce some super exciting news..there is to be a new challenge  here sponsored by countryviewcrafts.. (a wonderful online store with great prices and also free p and p.)
 So without further ado I am lucky enough to be one of the design team and am thrilled to be part of this team alongside some amazing crafty talent .

So the theme for this months challenge is pickandmix .. or anything goes.. so here is my make:


I decide to go for a journal page and of course you know me, there had to be a heart...so onto some of the details..

I started by putting some antique linen distress paint through a stencil and drying .. the fab thing about these paints is that when they have been dried they do not re-wet..so layers of inks, sprays or water can be added on top and the paint will stay as it was in the first layer..which makes them great for layering with distress ink.


Then I added some patches of distress paint in vintage photo, walnut stain and antique linen, spritzed with water liberally and held up to blend and drip.


I love the effect this created, when dry (I used a heat gun) I added vintage photo distress all over and flicked with water, left and then dabbed off. This creates white spots and speckles and allows some of the paint to show through. I then edged with walnut stain.

I then added strips of tissue tape, some coloured with picket fence distress paint and some straight from roll.

To add more layers I added splats using my antique linen distress stain, a real favourite technique at the moment.

The heart was cut from card, some tissue tape strips added and inked with antique linen stain, spritzed with water and dried. Then a few splats for good measure. I edged gently with vintage photo distress paint.


Finally I added the sentiment, stamped in coffee archival, which I cut into pieces and edged with vintage photo distress ink.

I hope you like my make, to see the rest of the fab teams makes be sure to hop across here  http://countryviewchallenges.blogspot.co.uk/  and  join in the fun,

the challenge lasts for the month and there is a £20 prize  and winners badge and the chance of a guest designer spot too.
 
have a fun and inky day!
hugs trace xx