Just wanted to say ... thanks for taking the time to stop by, hope you enjoyed your visit.x

Showing posts with label texture paste. Show all posts

Tuesday, 4 April 2017

Hello my Darling


So it has been a while but here is a tag I created using one of my vintage photos, texture paste and also plenty of distress crayons. 

I love this vintage photo and for some reason it make me think of my Grandad ...


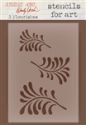
I started by adding texture paste through a selection of Tim Holtz stencils. When dry I added a layer of collage medium so give a great surface to use the distress crayons on...


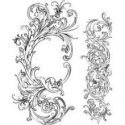
I then selected some collage elements to use on the tag. I inked the edges and also selected some idea-ology and a die cut heart that I inked and spritzed.


I placed them onto the tag to decide where to place them and added some collage medium and then some distress crayons..


And here is the finished tag ...I added some dyed seam binding, some staples from the mini attacher


I added the heart and word band at the bottom of the tag


I just love this photo and hope I have done it justice ...


here are a few of the details...

So there is my make ... a vintage coloured tag inspired by a vintage photo..

I would like to add this over at a Vintage Journey - where they are offering that you can add a tag for tag Friday.
I would also like to add it to Go Tag Thursday - where the theme is vintage.


trace x

Wednesday, 8 January 2014

New year's resolutions for Frilly and Funkie ... be kind to yourself

Well the new theme over at Frilly and Funkie is New Year's resolutions...and here are all the details :
It's time again for new beginnings and New Year's Resolutions. We know you got 'em. Even though you might not have written them down, told your significant other or shared them with your BFF, there are still some positive aspirations lurking in the back of your brain. Now it's time to share them.  Let's see a card, tag or project depicting a New Year's resolution.

So when I made my piece , I thought long and hard about the year I have had and decided that many things had taken all my efforts and energies and that to be a better person for all those I love and care about I need to remember to be kind to myself too...so that was mine... (however  I wish I had chosen Make it count, as sometimes sad events in our lives, that surround us, make us realise life is precious and we must make each moment count! Enjoy and savour life x)
So here is my make :
I started by colouring the canvas with antique linen distress paint and lots of spritzing, as I wanted a really soft colour. I then added some gorgeous flourishes using Wendy Vecchi texture paste in white, this stuff is fab and I am almost finished my second pot! I applied it trough one of the lovely Wendy's stencils, just love this flourish shape.
 When dry I added some script and flourish stamping in frayed burlap distress ink. I also added ink and some treasure gold in white fire to highlight the raised areas and texture.
I dyed some cheesecloth using left over to almost soften the heart...and the heart is a great Wendy Vecchi art part painted in rock candy crackle paint and when dry antique linen distress paint added and then swiped with treasure gold.

Now for the letters I used my trusty word play die and cut the letters from grungepaper, coloured with frayed burlap paint and then coated with glossy accents.

Well make sure you pop across and see what my fab teams mates have made , and also pop in an entry yourself!
Today  I am saying my final goodbyes to my Grandad, so may your star shine brightly xx 
Memory is a way of holding onto the things you love,
 the things you are, the things you never want to lose.  
~From the television show The Wonder Years


Thursday, 5 September 2013

art is art , however small... for Creative Expressions DT

Before I start my post I want to say thanks to everyone who takes time to leave comments, I am behind and will be catching up! But with the boys first day back at school and Lucy at her first nursery session...I have been a bit preoccupied...I don't like it!:(, love them being at home)...so sorry if I am behind ...I know again! Also welcome to all my new followers , thanks so much, I really appreciate you taking the time to follow my inky journey xx

Well this month we have some fab new goodies to play with and remember there is still time to enter for Creative Expressions DT Call ...here . so for this weeks make I have used Stampers Anonymous Tim Holtz Classics set #4 , gold pearl texture paste and some gilding wax.

So here is my mini make :


So for this make I made this mini canvas, I coloured the front side edges in brushed corduroy. I tore a piece of cardstock for the from of the canvas, as I love how these inks work on card, For the larger piece I stamped in brushed corduroy and dried with heat tool then inked, the piece on top was stamped in coffee archival and inked.


I cut out some hearts and layered to make a chunky piece and stamped the lady from the row of faces in coffee archival and then masked her off and added the wording stamp behind. I then added some dyed seam binding for another dimension and texture.


For the edges of the canvas I roughly applied texture paste in gold pearl and heated to make it bubble...gives great texture..when cool I applied some light golden coloured gilding wax to it. I also lightly rubbed this round the front edges .


I added some die cut flowers and rusty wire to the front to complete this mini make over .


thanks for stopping by and taking the time to leave a comment, when I have dropped Lucy off :( I will be blog hopping! )x

have a fun and inky day!
trace  x


Monday, 12 August 2013

finding a way to make it work for creative expressions DT

well today I have a post for Creative Expressions and am still playing with texture paste,I love steampunk so that features too...but it is a card! I am by no means a true cardmaker and there are many out there far more skilled than me , but as cards go I am happy with this...lets see  what you think!?

So here is my make :

I started by cutting a piece of mountboard to the size of the card, as this would take me messing around with inks and paints better than card, but heavy cardstock would be fine. I applied silver texture paste through a great netting stencil. Then I added some distress stains swipes in tarnished brass and black soot...these are just to colour the background.


I then set too with my beloved distress paints, again black soot and tarnished brass, applied to the craft sheet and spritzed and smooshed in. then I heated to dry, which makes the texture paste bubble and pit, great for this type of piece, for a smooth finish, avoid heating.


the next step was to add some more layers , I used some great steampunk stamps and inked in clear and embossed with black detail embossing powder.


I continued this randomly all over the background. Then stamped the main pieces in black archival and coloured up using distress inks in black soot and rusty hinge.I then spritzed and dabbed off.

 
Now for the cogs, I die cut some cogs and added texture paste in a bumpy manner and left to dry. When dry, I applied some tarnished brass distress paint and then some black soot using my finger tip .


 a few film strip die cuts and the card is complete..

 
So hope you like my texture paste step by step make, 

have a fun and inky day!
trace x 

Friday, 12 July 2013

just hanging about for creative expressions dt

Here is my make for Creative Expressions this week using this lovely  doily die and also yummy texture paste in silver pearl ( there are lots of colours to choose from and its great!)

I decided to make a hanging on mountboard and make use of a tag and doily die cut too...so here is my make :

 
I started by creating some textured areas using white cosmic shimmer texture paste through various stencils. then I coloured using distress paints, do so LOVE these...I used broken china and rusty hinge. I also used these colours for the die cut doily piece and also the tag . (the doily is a whole circular piece but here I have just used a small piece ).

 
I then added layers of stamping using bubble wrap background stamp and also text and numbers from Wendy Vecchi set , love to make art.

The sentiment create art comes from Wendy Vecchi set ...word art. This was stamped in black archival, and inked up using distress inks in broken china and rusty hinge.

The flower is silver pearl texture paste applied through Wendy Vecchi flower stencil, applied in a rough manner to create a textured finish.


I then painted the dried paste , with distress paints, and also applied gilding wax to highlight the texture.


The texture paste spreads really smoothly, but different textures can be achieved...I applied roughly for the flower...and for the strips the paste for the strips was applied smoothly and then blasted with a heat gun which creates these fab bubbles...These can be left or flattened slightly...and gives another texture but can be left smooth.


 I also added some rusty wire...not my usual colours but what do you think?

make sure you check out the other fab makes from my team mates x

have a fun and inky day!
trace x 

well I have had a quiet week, feeling slightly sorry for myself..but am trying to get back into creating and blogging and hopefully I will find my mojo lurking somewhere too.....So onwards...comments will be coming honest....

Tuesday, 2 July 2013

sizzling summer for country view crafts challenge blog

well the new challenge has started over at countryviewcrafts challenge and the theme is sizzling summer..so sorry I am a day late ...but was so lucky to be guest designer for Simon Says Stamp and show..so the lovely Chris said it was okay to be day late with this...so without further ado here is my summer sizzle...hold onto you hats, its bright!!


well the challenge was so far out of my comfort zone, but i went for it sizzling summer colours and all! We may not have seen much summer sizzle here but you can always make up for that in summery colours for your entry..

I started by applying texture paste (white) you could also use grunge paste through Dylusions number stencil..then when dry got inky!

 
.So I started with pure sunshine, bubblegum pink and funky fushia Dylusions sprays....spritzed my piece of mountboard with water and got spritzing!. I dried and then dabbed into some of the excess on the craft sheet until I was happy.

Then came layers of spritzing water through stencils for faux bleaching..


 I then added stamping using mixed media set and picked raspberry and wild honey distress inks...to create layers of interest...boy this is so bright for me...almost scaring myself!!

the flowers were cut using tattered floral die and cut from a piece of cardstock coloured with same Dylusions sprays..


I edged them in walnut stain ( back to comfort zone on that colour!) and then added a rusty bell centre. Now for the stems I curled some fab paper coated wire i found and added some fab idea-ology flowers...so I did use some home comforts..


Make sure you pop across and see the other DT members fab makes and remember you have a whole month to play and could be the lucky winner of a £20 voucher for country view crafts or be picked for our top three or special mention and get a GD spot x

Thanks for everyones lovely and hugely kind comments yesterday...it meant a lot! 

James continues to make only small and very slow progress so if I miss a few days commenting I may just be a bit preoccupied but will catch up...and thats my job for this afternoon!!This CFS is going to be a lot of a longer haul and far harder for us all than I had hoped ...but in pink fluffy bubble land....hopefully it will all be gone soon!!!(sadly reality may be a bit lesss pink and fluffy!) hugs James is trying a whole day today xxx fingers crossed for him xx And Oliver and Lucy are doing great xx

have a fun and inky day!
trace x