Well it is time for the funkie team to put up their pieces for the latest challenge over at Frilly and funkie , chosen by the lovely Rebecca... so here in her words is the theme for this fortnight..
'Neglected Dies'. The challenge is to choose a neglected die from your stash and let's see what you can create with it! Think outside of the box... or in it! Then share your projects with us to be in with a chance of winning a Guest DT spot here at Frilly and Funkie or a $25 spending spree at The Funkie Junkie Boutique!
Remember, to enter you must create a new project, link it below and make sure you add a link in your post back to this challenge. You can combine our challenge with up to 10 challenges (including this one) to be in with a chance of winning.
and here is my make :
So my neglected die is the postage stamp die...and I decided to make a shadow box, then changed my mind and went for this instead...a sort of shadow box, hanging thing! Hope you like it .
So for the start...I die cut a base piece from greyboard covered in card ..and a spare card piece for the base. Then using the movers and shapers rectangles I turned the postage stamp die into a frame and cut from old cardboard boxes and also one greyboard piece for the front.
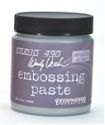
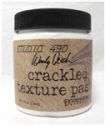
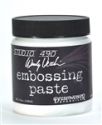
I also cut a heart, by tracing round the heart shape in Wendy's stencil. Then got playing with Wendy Vecchi's wonderful pastes, these are so yummy! For the base piece I applied a thin layer of translucent paste and then crackle paste (thin layer) to the card. For the heart and the frame piece, I applied silver paste ( a really thin layer) and then when dry a textured layer of crackle paste....as I wanted some bigger and some smaller cracks.
Now for the details...the base piece:
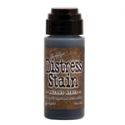
I coloured this up with frayed burlap and walnut stain Distress ink and rubbed some stain in with my fingers, the heat dried and then stamped script in coffee archival.The crackle is just yum!
Now the frame:
It was put together to allow the heart to be held in....the idea being that our fears hold us in and courage gives our dreams wings to fly... so here is how I layered it up..
I wrapped the heart in one piece of rusty wire ..having inked up...look at that crackle! then I added to base part and added one piece of the frame on..with wire added across it..
This means when I add the top layers the wire will be trapped within the frame..and raised from the heart if that makes sense?!
I added these gorgeous wings to the sides and also on rusty wire a word band at the bottom...that reads..
"encourage your hopes and not your fears".
So make sure you pop across and see what my fab team mates have done with their neglected dies..and maybe find a neglected die of your own and play along.
Well it is time for the Funkie team to unveil their makes for this fortnights theme for Frilly and Funkie DT and the theme has be chosen by the lovely Sue ...and is stencils and textures ..here are the details...
Stencils have become a firm favourite of mine and are really popular in the crafting world now. So, for this challenge let's see you use your stencils on your projects but also lets see some texture too! This can be embossing, texture paste or even fabric. But most of all have fun! If you'd like a chance of winning a Guest DT spot here at Frilly and Funkie or a $25 spending spree at The Funkie Junkie Boutique, you must create a new project, link it below and make sure you add a link in your post back to this challenge. You can combine our challenge with up to 10 challenges (including this one) to be in with a chance of winning.
So I had so much fun playing...ahem ..I mean making this piece and here it is :
I wanted to add lots of layers and textures ...so here are some of the steps of how I got to the end..
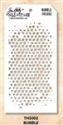
I started with one of Linda's #10 tags from the boutique and applied some of Wendy's new crackle paste to some areas and then some of the clear paste through a Tim stencil..When dry I realised that it didn't quite have the effect I wanted ..so thinking cap time... I added some colour using distress ink and then applied some more of Wendy Vecchi crackle paste ...across the stencilled clear paste...and let it do its magic!
I love the soft crackle here , as a thin layer had been applied over the clear stencilled paste...and also here applied straight to tag
I also added some weathered wood distress ink through the stencil in places and then edged in walnut stain distress ink...so layer one complete with tissue tape ...all done ...
Now for layer two...I used a #8 tag and applied white Wendy vecchi embossing paste through this fab prima stencil in areas...and then some crackle paste in areas...colouring with distress ink when dry...
Then I set too layering and embellishing the finished piece... I added a piece of corrugated card stock and then a little piece of card..with tissue tape layers and more crackle paste..then a heart cut from Wendy's heart stencil..used as template and covered with glitter .and some rusty wire..
I added some idea-ology and one of the new idea-ology arrows wrapped in rusty wire.. some dyed seam binding and more idea-olgy.
At the bottom I added some of the new burlap and a word band tied on with more rusty wire..
Well hope you like my make and make sure you hop across here to see my fab team mates makes...hopefully you will find time to hop across and join in all the fun too ! x