Just wanted to say ... thanks for taking the time to stop by, hope you enjoyed your visit.x

Showing posts with label A vintage journey. Show all posts

Monday, 31 August 2015

Destination Inspiration, sneak peak for Terminal 4

Well it is my turn over at A Vintage Journey today , for the Destination Inspiration post....where we have a list of four ingredients chosen by my fellow guides and myself....
here are the ingredients..
1. Product - Alcohol Inks
2. Technique - Alcohol Ink Ombré CC Vol 3, Page 57
3. Colour - Butterscotch
4. Substrate - Metal Foil Tape

If you would like to see what I created ...
please hop here ...


Friday, 31 July 2015

Tell your story - for Tag Friday over at A Vintage Journey

So it is Tag Friday over at A Vintage Journey ... I love making tags and I love the found relatives cards , so that that was my staring point ... so here is my tag :

I love creating male inspired tags and using lots of yummy Tim Holtz goodies are my favourite ! I started b y creating the background ...and was so in the moment afraid there are no step by steps ..sorry..but...sometimes creating in the moment is so wonderful you get carried away!

I love the texture paste through a Tim Layering stencil covered with lots of yummy distress including walnut stain, hickory smoke, rusty hinge and finished around the edges with some black soot..


The new distress sprayer makes getting the flick and spritz droplets super easy... and I never stop loving the way distress reacts with water..a bit like the first time you see embossing powder melt...magic!

I completed the top of the tag with a double bow created using dyed seam binding...for vintage crinkle ..


Now if you are a regular here you will know how much I adore the found relatives cards and I love how I can start with one and the rest sort of creates itself around it! I have scuffed, sanded and inked this gent and hope he would be happy with his place on this tag?


I chose a flashcard, plenty of yummy idea-ology and a word band to help tell the story of my tag ... I added a stamped sentiment using handwritten stamps from Tim Holtz and a number plaque...do love numbers .. they seem to lend themselves to all sorts of creations!


To continue the vintage feel I used the distress spritzer and my black soot distress marker, it is amazing how these little details make such a big difference ..


So hope you will pop across to A Vintage Journey to see all the other fab takes to insipre you .xx


Friday, 3 July 2015

The journey awakens the soul for A Vintage Journey.

Well it is going to be a busy week on the blog and today sees the start of the next journey over at A Vintage journey and the theme this month is Destinations.

Now as a huge fan of the found relatives I used one to inspire this piece...I love how each image seems to have a story to tell and this showed the way to Paris for these two young people to share and celebrate their love.

 I am not great with words so will let my crafting elements tell the story ....


I started by covering a mdf board with paper from the French Industrial paper stack with the Eiffel tower on it , covering with picket fence distress paint and smudging and hen adding areas of clear embossed script. 
I edged the board with tissue tape to finish of the sides of the board.


Now for layers of ephemear from the gorgeous Tim Holtz ephemera packs and also some pieces from the pocket card packs. I scuffed the edges and inked with walnut stain distress ink.

I tied a bow around it using seam binding coloured with tattered rose distress stain .


I just love this colour and it has to be added to my favourites list .


Here is a close up of the embossed text ...


I die cut some trellis using the new frameworks die from thick card, I coloured the card with antique linen distress ink and then covered with a layer of Decoart crackle glaze. 
When dry I rubbed walnut stain distress ink across the surface and into the cracks.


here it is against the background.


I scuffed the image and sanded it and added some tattered rose colour to the flowers using tattered rose distress marker.


Here is the finished piece I added some tattered rose flower embellishments, adding some buttons to the centres.


I added a stamped image of the Eiffel tower using the framelits set and die cut, inked and then covered with crackle glaze and when dry rubbed ink into the cracks. I added a scuffed and inked flashcard, a die cut heart..inked , crackled and then with ink rubbed into the cracks.

I lightly inked the flowers with tattered rose distress ink and also added a word band from idea-olgy range.


here is a close up of the Eiffel tower..


So I do hope you like my make and make sure you hop across here to see all my team mates makes..you won't be disappointed! 


You have a whole month to join in the fun and could be a guest designer or win a voucher for Country View Crafts our generous sponsor.


Friday, 1 May 2015

treasure those special moments - for A Vintage Journey

Well the new theme over at A Vintage Journey is Spring Colours and with so many ways to interpret this theme its full of creative possibilities! To me the Spring is about the blossoming flowers and soft mellow sunshine that breaks through with its soft warmth and not yet intense heat and colour of the summer. So here is my make :


So I started by covering my mdf square in the resist motif paper stack.  I inked with scattered straw and squeezed lemonade two colours that I am ashamed to say don't get much of an outing.. I then spritzed some water and allowed the colours to drip, dried and spritzed with some distress spray stain. I just so love how the distress palette is so yummy and all three products just work so well together .


 I edged the whole piece in walnut stain distress ink to edge the whole piece.. and added some seam binding dyed with same colours of distress .


I am not normally a yellow person, but this mellow yellow reminds me of the soft sunshine that appears in spring, although grey and rainy here today :( .


Now for the fun , collage element, I tend to gather things together and faff about until I am happy, faff being a technical term for shuffle stuff about and waste a lot of time until it looks right , well to me anyway!


Now for the details ...as you know I have a teensy thing for the found relatives cards ..and yes another one found its way on here..scuffed and then various Tim goodies were added, a die cut word..loving these new thinlits! One of the new fractured dolls..yum! a typed token ..love these too...well lets face it I do have a small thing for idea-ology!


I was so sad to see the fractured dolls go and am so pleased that they are back in some form...!


I made some flowers using cardstock, coloured with distress and added resin flower centres from idea-ology range, dabbed with distress paint.


  and a smaller flower here ..with foliage leaves from idea-ology..


And this is how it all fits together, make sure you hop across to the blog here , for lots more DT inspiration..and remember you now have a whole month to play along with all your Tim inspired creations! so why not join in the fun!


keep those fingers inky!
see you in a few hours for my Country View Crafts piece x
trace x


Monday, 20 April 2015

Destination inspiration ...- its the small things ..sneak peak

Well it is my turn over at A Vintage Journey today to have the #3 post for the Destination Inspiration posts, these have taken on a new look and now each week of the month one of the team uses the same recipe and provides some inspiration , using that recipe.

So it is my turn today and the recipe is :

Product - Distress Paint
Substrate - Canvas
Technique - Grungepaper flowers (Vol 1 of Tim's CC3C Book, page 65)
Colour  -  Picket Fence

and here is my sneak peak


...I used two small canvas and joined them together to create a hinged piece, allowing me to design on the inside and the outside of the two pieces..so plenty of space to play!

If you would like to see the finished piece please hop over to A Vintage Journey to see all the details of how I created my piece xx

keep those fingers inky!
trace x


Friday, 6 March 2015

All you need is love for A Vintage Journey .

Well it has been a while since my lovely team mates gave me some time out but today I am back to join my fellow creative guides over at A Vintage Journey to celebrate A Vintage Journey's 1st birthday!
So the theme for this challenge is Anything Tim. I mean it would be rude not to join in the fun !
There are some exciting change afoot over at A Vintage Journey, so make sure you pop across here to see my team mates gorgeous makes and also the exciting changes afoot.
So here is my make :
I am so loving playing with collage style pieces and layering pieces, coupled with of course plenty of distress, idea-ology and general tim Holtz goodness. This piece just created itself with lots of layers and I even managed to do a little stitching with my new machine..thanks to Anne for all your help!
I so love the found relative cards and this picture was my starting point. I used lots of ephemera from the packs, plenty of idea-ology and a heart made using crackle paste and some decoart paints.
I covered a piece of mountboard with some vintage music paper, layers of picket fence distress stains and some distress ink. 
(sorry got a bit carried away and there are no step by steps x)

I scuffed and distressed the found relative card and added some walnut stain distress ink. the heart was die cut and layered with crackle paint and brushed over layers of paint. The ephemera pieces were scuffed up and the edges inked and layered up.

.

I added stitching round the photo, and scuffed up a bit to remove some.


I added the key with the word memory on to fit in with the overall theme of the piece.


I added one of the new small talk sets...all you need is love and some more idea-ology.


Well hope you like my make, it is great to be back and hope you will find time to pop across and see all the other pieces and some of the exciting new changes that are coming up.

whatever you are up to hope you find some you time x
keep those fingers inky
and those hearts full!
 trace x 

Friday, 5 September 2014

always and forever for A Vintage Journey

Well it is time for another challenge over at A vintage Journey and the theme this time is with a flourish...alll the details can be found here. So here is my piece :


I started with the new motif resist paper and it is gorgeous xx I played with some sofetr colours of stain for me to create the background., added to mdf plaque and edged with dried marigold distress paint, inking edges when dry with walnut stain.

For the foal point this gorgeous picture from the found relatives pack, just love this...I scuffed distressed and inked.


I added plenty of idea-ology on the piece and some of the great rub ons . film strip always seem to go well with these photos. I dyed some seam binding and scrunched to dry , in a really soft colour.

I added flowers , made suing tattered floral die with idea-ology centres and die cut flourishes.


I love how the motif paper flourishes look too against these softer colours. More idea-ology in the form of a muse token smudged with treasure gold.


I added this fab metal embellishment which was coated with glue and seal and then rock candy before adding paint and stains.

These are not colours I usually use buut I am really pleased, for once, with how this turned out!


Thanks for stopping by, I am busy today as I have a Friday focus up for Frilly and Funkie today too, with wonderful stamps...

keep those fingers inky!
Thanks to everyone who has found time to leave comments or stop by...life has a rather busy schedule for me so sorry as my visits and comments have been a little lacking...
trace  x

Friday, 29 August 2014

Wishing you were here

Well over at Country View Crafts today is something a little different, some of the team have created some postcard inspired pieces...so make sure you pop across here to see all the different creations!
So here is my postcard...I wanted to create something vintage inspired , so here it is :


And here is the back as it felt a shame to leave it plain ...


 So here are all the pieces that I collected together for the postcard... I created a background piece ( shown below) I then cut out various pieces from the wallflower and french industrial paper stacks that I wanted to use. I also selected a heart charm and dyed some seam binding.


This doesn't mean that You have to sue all the pieces...but I always collect together pieces that I think will make the final cut when creating like this..
Here is the background created using distress paints and stains, scuffing the edges and then inking with walnut stain. I wanted this to give my postcard some thickness and so I could stamp the details for the back.


first I tied the seam binding around the main image and then added to the base postcard.


I decided that there was something missing from my collection of pieces as when I placed them on the card and moved them around until happy it was missing something, so decided to add some butterflies. This time I used some of the gorgeous ones from the wallflower paper stack and just added some colour suing distress markers and a water brush. I tend to collect a palette of colours together and don't always use them all.


I then added some colour and washed with water from the waterbrush to blend and soften .


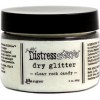
Now for the details, I inked the cut flowers with walnut stain and added some glossy accents to sprinkle over rock candy distress glitter for a little added detail .


The butterflies were just glued in the middle so I could shape the wings..I know if Mr Postie got them they would get squished..but they looked pretty!


I added the heart charm on a jump ring..( a Paris image inside too..lucky I had not used that one :) )


More butterflies and a hash tag stamp complete the card..
For the background I stamped the word postcard and added some text and a stamp cut from the paper stacks x


Thanks for stopping by I really appreciate people taking time out of their busy lives to pop by and visit!