Just wanted to say ... thanks for taking the time to stop by, hope you enjoyed your visit.x

Showing posts with label Brett Weldele. Show all posts

Wednesday, 4 February 2015

Dabbling with DecoArt

Well over my time out from blogland , I felt I wanted to play with something new to keep the old grey cells going....I had briefly tried some of Andy Skinner Timeworn Techniques but never found the time to really play....now I had a break from blogland and had a break from crafting...the need to get painty and inky was back...so playtime...some kind words from Mark Gould and I was off to dabble....

Armed with some new DecoArt goodies thanks to my lovely hubbie...I set too, to just play..and here is the first piece finished..be gentle!


So I didn't have a total end in mind, just to play with the paints and mediums and see where I ended up ....I wanted to play with some colour...and lots of the yummy texture creating mediums....

I coated my mdf board with some gesso and then applied some crackle paste in places and also some modelling paste , stippled in opposite corners...just playing to see what happened...


I then added colour over the whole piece... and built up the layers of colour using a brush and also rubbing some of the colour on using my fingertip.... I used blue green light, cobalt turquoise hue and cobalt teal hue. Then some quinacridone gold, all from DecoArt media line .


....around the edges I applied some crackle paste and layers of paint.....


Just love the crackle , yummy! I love the smudgy feel of applying some of the layers of paint with my fingertip , rather than a brush..


So here are some close ups of the finished piece... I used a technique from Andy Skinner's Timeworn course...so cannot divulge the details but details of the course can be found here.


 For some of the idea-ology and die cuts I dry brushed some additional paint over them.


Here is the difference in the finish of the cogs... I used a splatter brush over the background to splatter paint across the background.. and aged the word band using some paint rubbed across using my fingertip.
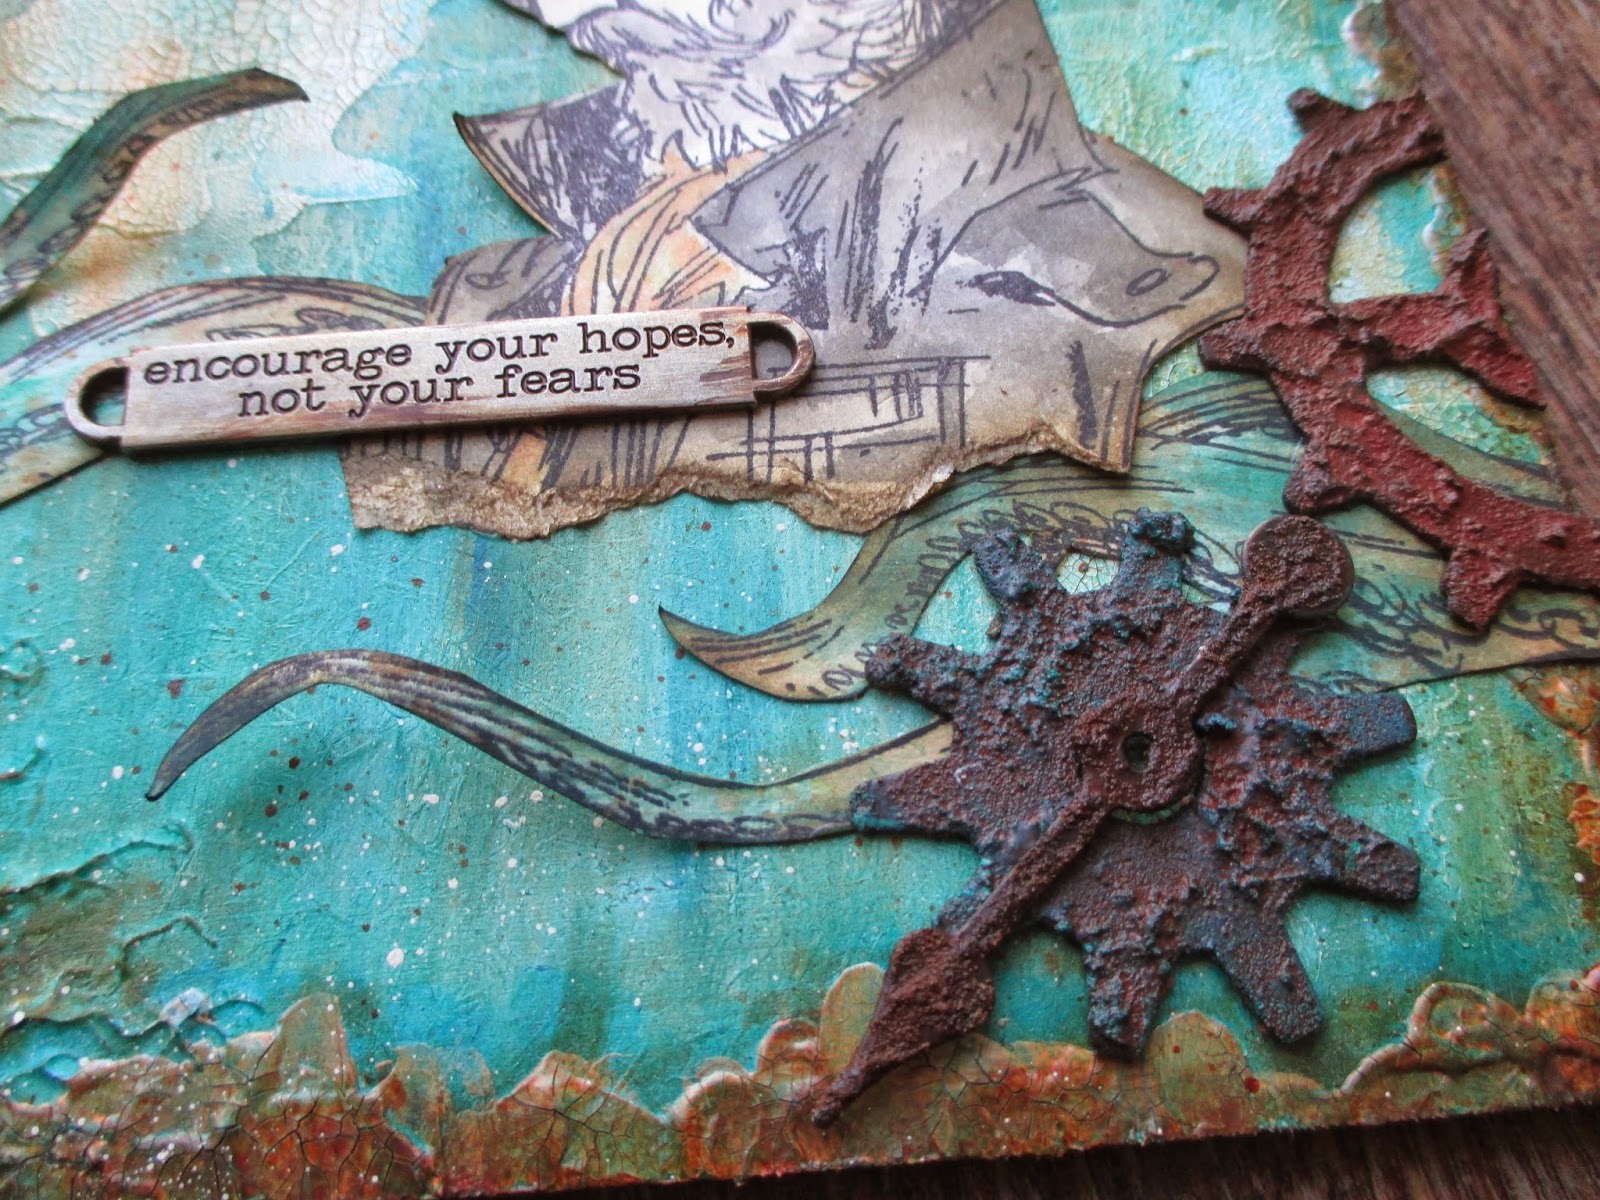

Here is a close up of the stippled texture of the modelling paste which..I so want to play with some more...and this piece was all about playing and experimenting..


I used some of Brett Weldele's stamps and felt this ship's captain and the tentacles fitted the background colours... I coloured the images using distress markers.


Anyway, thanks for stopping by...I hope you like the first results of my playtime!

keep those fingers inky and painty!
and those hearts full.x
trace x

Friday, 5 September 2014

Friday focus for Frilly and Funkie sneak peak...Brett Weldele stamp

Well Trace here and it is my turn for the Friday Focus and I am so lucky as the focus is the Brett Weldele stamps. He has an amazing style and I loved his stamps from the first set that was brought out with Tim Holtz. He now has some more sets and they are great fun to use.... make sure you hop over here to Frilly and Funkie to see lots of makes.... also I have a post up for A Vintage Journey and that can be found here. Busy busy...

here are a few sneaky peaks :

  and 

there are lots more and all can be found here ...

keep those fingers inky!
Trace  x

Saturday, 29 March 2014

Saturday Step X Step sneak peak - hey Mr Music Man

Well it is my turn for the Saturday Step X Step over at Frilly and Funkie so if you want to see the details of the piece below please hop across here and see all the details x


Tuesday, 4 February 2014

Pure indulgence

Well you know we are all so busy and my life right now is so busy I wonder how I find time to eat let alone anything else but....having been thoroughly spoilt for my birthday( thanks hubbie and children!)...it would be rude not to indulge in a little playtime ...just for me....So after much deciding...over which set of yummy new stamps shall I play with first...(yes I was lucky some new Tim ones and some new Brett Weldele ones ...and lots of other goodies....very spoilt!) I decided upon this fab gentleman from the ships captain set...and the rest was pure playtime....

So here are the results a large tag ...just for the pure pleasure!


I started by playing with some distress stains....namely faded jeans ...hasn't been off the shelf in an age and thought it might be feeling unloved! and evergreen bough...So I smooshed and spritzed until happy and also did an extra piece which I set aside  for the tentacles to be stamped on.
 I then edged in walnut stain distress ink...gosh I love this colour!


I stamped the tentacles onto the background and added a bit of colour with my trusty distress markers and then when dry a smidge of walnut stain.


Now for this rather captivating chappy! I think he has gone to the top of my favourites...there is something about him...stern yet captivating! maybe its just me . I coloured him with my much loved waterbrush and distress markers...tearing the bottom edge and inking .


finally lots of yummy idea-ology, in my book a girl can never have enough cogs!and some dyed seam binding...and voila happy me and happy playtime pleasures !

keep those fingers inky!
trace x 

Sunday, 1 September 2013

Pure Chemistry for Country View Crafts DT

Well it is time for another challenge over at Country View Crafts and the fab new theme is Layers... right up my street..and my fab new Tim Holtz set designed by the talented Brett Weldele came out to play. 

Do you ever get a set of stamps that you want SO much and they just seem to be made for you! Well this set are so up my street and I certainly enjoyed my creative journey with these....LOVE them! 

So here is my layered make :


 I was going to get carried away and make a darker coloured piece but wanted to play at building up layers in a different and softer way, got carried away though.... So below are the step by steps of how I made this piece, you made need a cuppa...or stronger...lots of pictures...please feel free to scroll to the end if it is too much!!

I started with some fab Tim Holtz die cuts and glued them to my base of mountboard.I used gears, mini gears, tattered banners strip die, ticket strip die and mini ticket strip die and hardware findings.When happy I glued them down using glue and seal. then added some white Wendy vecchi texture paste through a script stencil.


Then painted over in nougat paint, then added some frayed burlap distress paint watered down.


I then set too adding highlights of ink and building up the colour using frayed burlap, pumice stone, vintage photo and walnut stain DI.


Then I started adding subtle stamped layers that eventually build up the whole, this really was a journey of exploring and playing...I used warehouse district ( totally love this set!) and my yummy new sets : poisonous, The Chemist, Laboratorie and also apothecary sets.


Now onto the details...you still there ?

The poison labels (poisonous set) were stamped onto a paper with a sticky back and spritzed with vintage photo re-inker in a  mini mister..
 

 I then cut them out and used ranger glue stick to add to mini vials..adding little labels using tiny tabs die and rusty wire..


now the fab Chemist himself, coloured using distress markers and waterbrush..I just LOVE this stamp...can you tell?! and the laboratory stamps and poisonous stamps combine so well........pure chemistry you could say!


I added one of my all time favourite quotes from Tim Holtz set...lots mote idea-ology..oh and I did highlight a few areas with treasure gold...so lots of layers .

just a few more..honest!!


So there you have it , make sure you pop across here  and see what my fab team mates have created for this layered challenge and hope that you have time this month to pop in a layered make yourself!

Hope you like my make I had a ball making this and you can be sure these stamps will be getting inky again very soon!

have a fun and inky day! 
trace  x