Just wanted to say ... thanks for taking the time to stop by, hope you enjoyed your visit.x

Showing posts with label Andy Skinner. Show all posts

Tuesday, 24 May 2016

Painty playtime

Well it has been a while and I cannot say that I have managed to make anything much of a finished nature .... but I have decided to have a bit more of a play with some of my DecoArt paints and some techniques from Andy Skinner ..

These will be put into a final piece but for today were just the results of some weekend playtime and just getting back into something painty...

so here goes ..

I have followed the steps from the timeworn workshop , which I have re enrolled to and this time its a lifetime access .... all the details can be found on Andy Skinner's blog

I have never tried this one before....and am quite pleased with how it turned out ..


and this is another piece ...


A rusty piece , which I have tried before ...needs a bit more work...


This is a rusty textured piece, but still wet ...and needs a bit more work...


and this wood technique can be found from A Vintage Journey blog, used by Brenda Brown... of bumblebees and  butterflies blog...


and this is a work in progress ...


so there you go, no final make, just some work in progress and some learning in my painty playtime.

keep those fingers inky!
or in this case painty!!

trace x

Sunday, 5 July 2015

Travel the world with those you love for Country View Crafts

Well the new challenge theme over at Country View Crafts is 'on your travels' and for my second offering I have made a little mini travel journal using lots of DecoArt goodies and my passport die designed by Eileen Hull...I think this is such a versatile die and sure to be used a lot!
So here it is :


and here is the inside : ready to be filled with all your travel pictures, souvenirs, holiday memories and whatever else you want ...

So some step x steps of the cover part ... I die cut the cover pieces from v thick card ( about 500gsm ). I then applied some DecoArt crackle paste through one of Andy Skinners new stencils -and left the crackle to do its magic! I then coated the pieces in titan buff paint (one of left painted )


I like to use my fingers brushes and semi dry baby wipes to apply my paint , swiping layers of colour across ..I started by swiping various colours, building up the layers including paynes grey, blue green light, burnt umber,


English red oxide, cobalt turquoise .. sorry got carried away so layers were built up until I was happy with how it looked...


I then , when happy -ish applied some interference gold ...applied here to one of left..


When happy I sealed with matte sealer to keep the layers I have already in tact...when dry I dripped some washes of quinacridione gold down ..to mimic rusty stuff!


To complete I added a layer of black antiquing cream, left to dry and then wiped back to reveal some of the colour underneath...I love the look this gives the finshed piece...the great thing is you can rub away as much or as little as you like...I then sealed with matte sealer (all DecoArt ).

To add to the front I die cut a movers and shapers Tim globe and treated with crackle, painty layers and antiquing cream before sealing...

Now for the inside ...I die cut all the pages using correspondence paper stack , inked the edges and added some rub ons to them..

I added ... some of my favourite photo booth images....these two look ready for some adventures...and one of the great small talk quotes, copped into sections and inked around the edges...


Inside the back cover I used the great new envelope die from Tim Holtz to create a little matching envelope to store tickets of any other small bits and bobs from your travels...and there is a perfect rub on for all you want to say... here ..collector of memories...


So here is the front cover complete with globe...all the ages were tied in in groups using dyed seam binding and tied on outside to form bows. I added a chit chat sticker to complete the cover ..


and on the side I added one of the gorgeous travel charms from idea-olgy range..


So hope you like my make, you have plenty of time to join in and it would be great to see what you make .xx


you could be one of the lucky guest designers or the winner of a voucher to spend in Susan's jammed shop, so why not pop across here to see plenty of inspiration and pop in an entry xx


So safe travels on your journeys...however near , or far....



Monday, 13 April 2015

foray into foamboard

Well this piece is hugely inspired by the talent that is Andy Skinner , some playtime and some foamboard...wow what cool stuff that is ! This piece was created a while ago and has benn patiently awaiting blogging ...so here it is :


I got so carried away that I am afraid there are no step x step photos! I used some mdf for the base but after seeing Andy Skinner's demos from CHA had to try foam board and see what it was like so the raised pieces top and bottom are foamboard...love how it takes the layers of paints and gives great dimension. i made various embossed and crackled pieces and plenty of rusty gears as well as crackling a wooden heart and using various decoart paints and products to create this piece .


I love the look of the embossed panel with various painty techniques and then the antiquing cream and matte sealer... think that is my favourite piece of this whole piece...


I loved how well the wooden heart was altered with simple layers of products to create something that was more pleasing, well to my eye at least!


I even used the  paints to antique up some shiny screw like embellishments and tone them into this project. There were plenty of painty layers on the foam board too...


Well hope you like my dabbling playtime, still plenty more to learn and play with but I think I am fairly happy with the results for start!


So that's it for today, hopefully with internet issues remedied I will be round to catch up on some long overdue blog visits really soon .x

keep those fingers inky and painty!
trace x 

Thursday, 9 April 2015

Positively playful

Well as I am scheduling in some blog posts while busy enjoying my family I decided to share a dabble with decoart I created a while ago... so here it is :


I created the drippy background using distress paints and some homemade sprays using mini mister bottles and distress re - inkers.


The next layer was created using a tag, embossed and then painted using the decoart media range of paints, the cool thing about layering these is the chance to play with transparent colours allowing great layering. I then added some crackle glaze and when dry rubbed paint into the crackles.


 Then I added some stitching, to give a different detail...


Then it was time to layer up the card, I added some stamping using one of Andy Skinners new stamps...love this circuit board...which I stamped in paint...just make sure you clean off your stamp fairly quickly. i die cut, painted and crackled a heart which then had a coat of decoart antiquing cream painted on and rubbed off highlighting the crackles.


I added some rusty wire and plenty of my favourite pieces of idea-ology for good measure .


Finally I added some stencilled detail using Andy Skinner's have your say stencil using paint.


 So there you have it , my decoart dabble meets distress playtime..and I made a card!

on my return, hopefully internet issues fixed I will be back to catch up on some long overdue blog visits x 

keep those fingers inky and painty!
trace x 

Monday, 2 March 2015

My family have my heart

So here is the result of some more play time... I wanted to play with some more of my decoart goodies but mix them with some of my yummy idea-ology bits and bobs. So with some help from my father in law who cut me some wooden house blanks....here are the results of my painty playtime.


I have had such a good time playing with painty layers to create a distressed finish...I hope ... I edged each house in tissues tape and covered in a wash of matte varnish and quin gold and paynes grey to create a dirty wash...thanks Andy skinner for this idea !!!.. My father in law cut these houses from some sketches that I had drawn...lucky me and I have had a lot of fun decorating these.

The houses are free standing but could have a piece added to hang on the wall... For this house I covered the blank shape in paper and then varnish and painty layers using decoart and distress. I edged with tissue tape. The roof had an Andy Skinner stamp ( wood effect) stamped over roof and inked. I added a chit chat sticker, inked and sealed and a rusty heart... I know can't stop making these!


I tried to make each house different but so that they had a similar feel so they could be stood alone or in a group.


This house was decorated with layers of paint rubbed on with fingertips and also with a baby wipe to add and remove areas of colour for a distressed feel.


 I added one of the new typed tokens and die cut a heart which was stamped, painted, covered in crackle glaze and had paint rubbed in cracks.


Finally a taller house with a wonky bottom...again painted to give distressed feel and sealed with dirty wash.


 Hope that this shows how the tissue tape looks around the sides...


I completed with another handmade rusty heart and chit chat sticker..


I hope you like the results of my painty , inky and distressing playtime!

keep those fingers inky
and those hearts full!

trace x 

Wednesday, 25 February 2015

Painty Playtime.

So another blog post ... I have been finding time to play on and off and wanted to just play along with a challenge as it seems such a long while since I have done that....I mean forever ... so armed with lots of goodies I decided to have a go and join in over at Our Creative Corner.. and here is the result :


The challenge is a Tic-tac-toe board and from this I selected paints, stencils and stamps...they may not all be easy to see straight away but I promise they are all there ....

I started with an mdf board, covered in Decoart gesso and then I spritzed with turqupise shimmer mister from Decoart , some water and created lots of drippage dried....


I loved the vibrancy of the Decoart mister and the cool effects I got, once dried I edged with walnut stain distress ink and stamped some of Andy Skinners new crackle stamp using titan buff paint...in random places .


Then I stencilled through have your say stencil , using walnut stain distress ink...just some of the numbers in random places.. to complete the base layer of my piece.
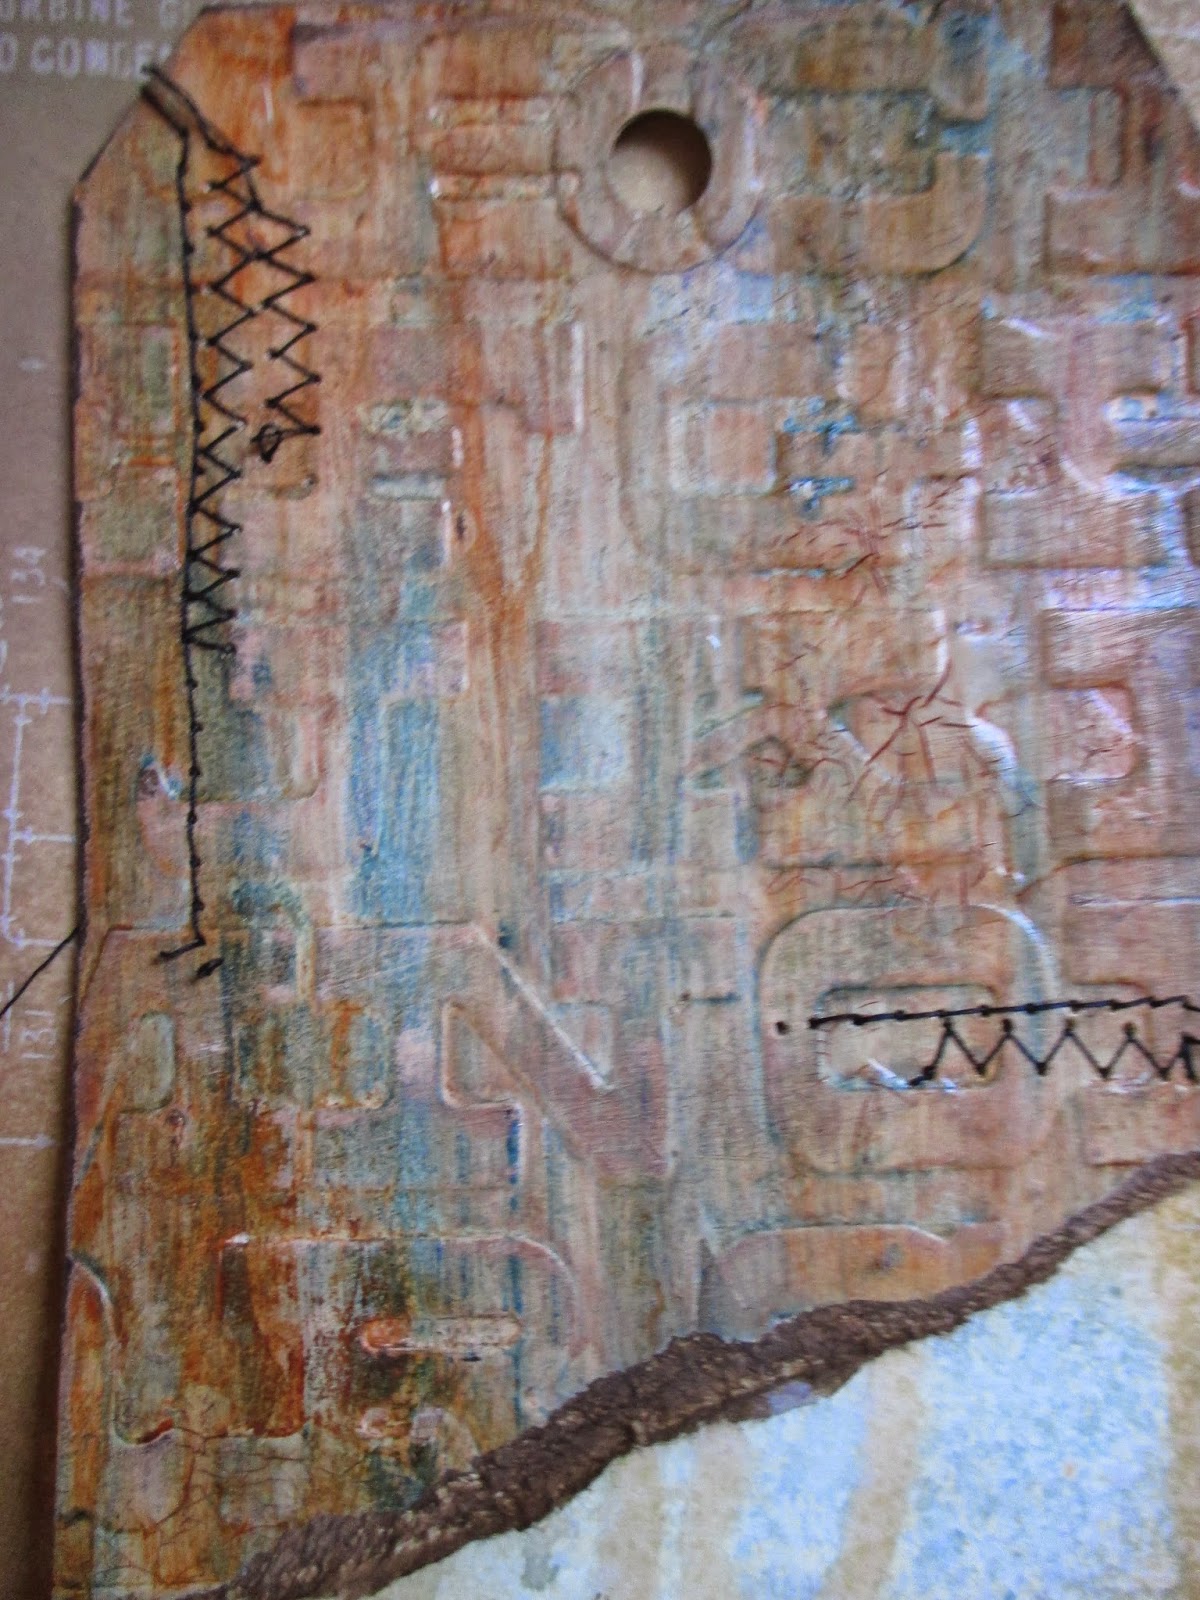

Now onto a tag, using various colours of Decoart paint , crackle glaze and antiquing cream....it is so much fun to play and am loving these yummy goodies from my hubbie x


I added some rusty trellis, using Tim Holtz die , rusted using timeworn technique from Andy Skinners online workshop...I know again...but I cannot stop making this stuff!

I love the rusty colours against the turquoise.... and this made my next layers..


I added a rusty heart using new Tim heart die and same rusty technique...added to some driftwood..


I love the found relative and occasions relatives card and this one seemed to fit my sea colours... I sanded , distressed and added a bingo token given some Decoart painty treatment,


Some rusty wire ...because you can never have enough....


  and some rusty wire to create a hanger for this piece..


Well I hope you like my Decoart and distressing playtime...I loved it!

I am going to enter this for :
Tic Tac Toe @ Our Creative Corner
No Rules @ Simon Says Stamp

keep those fingers inky and painty!

trace x