Just wanted to say ... thanks for taking the time to stop by, hope you enjoyed your visit.x

Wednesday, 21 August 2013

come fly with me for Dragons Dream TIO DT

Well this fortnight the lovely May has chosen the recipe for Dragons Dream TIO and so all you have to do is make a tag, using at least one rubber stamp and include the ingredients : Time, Orange and Nature.

So here is my make :


Inspired by using a brayer to create backgrounds with distress stains from Tim's tags here ...I decided to use this technique to create this background. I also brayed some picket fence distress stain over the colour when dry. The base colour was spiced marmalade Distress Stain. When dry ( I blasted with heat tool ) I over stamped with some text script using Spiced Marmalade Distress ink, in random places on the background.

For the time element and nature parts I stamped this gorgeous image from Oxford Impressions set, The Bird's Nest and coloured using Distress Ink and my waterbrush. I then added some of this fab clock die cut to put the image into.


I never really use orange unless it is for Halloween but love the rich seam binding colour and liked the soft effect with lots of water That was created by lots of spritzing for the flowers. (using tattered floral die).

 
I also added some curled flowers , not perfected these at all yet, and some leaves and twigs from Autumn gatherings strip die.

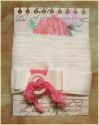
Some dyed seam binding finishes the top of the tag...and no idea-ology in sight!? I know ..think I might be shaking a little at that thought!PLenty of Distress goodness though..

 
Make sure you pop across and see my fab team mates makes here  and hopefully make a tag and join in the fun x

have a fun and inky day!
Trace x 

Monday, 19 August 2013

words, words, words..

Before I start my post I want to say welcome to my new followers and thanks to everyone who takes the time to visit and leave a comment, it mean a lot...so thanks xxx

Well here I am with my 2nd piece for Countryviewcrafts this month where the theme here is Quotes and Quotations. So here is my make this time, a mini quote book:

 
and inside some of the pages :


I started by creating the backgrounds for all the tags using distress paints, did I say still LOVE these!

 
I then inked with frayed burlap and got to work stamping lots of different stamps to build up interest and detail..some tiny pieces stamped in frayed burlap, these fab splatters stamped in vintage photo. Then pen nibs and my favourite flourish (this is same flourish just smaller) all stamped in coffee and black archival. This helps some of the stamping to appear softer. ( click on the words to be whisked off to relevant stamp sets x)


 So this is one of the blank pages...then I collected together lots of my favourite Tim quotes that make me smile or make me think...or I just love . I stamped them all in black archival, tore out and then inked with brown distress in vintage photo, frayed burlap and walnut stain.

 
I then added them to the pages..


Then onto the cover,


 I stamped the word for the cover using the fab new letter set , worn text from Tim Holtz here..and lots of my favourite idea-ology..tissue tape, film strip, numerals, pen nib, mini vials and philosophy tag.

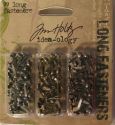
I bound the mini tag book using hitch fasteners and tied the book using seam binding dyed with distress stain.


I added a quote on the back cover:


 Well hope you like my make, there is still time to play along in the challenge here..

Thanks to the lovely Anne reminding me I would like to enter this for the following competition:
words, words, words @ http://ourcreativecorner6.blogspot.co.uk/2013/08/words-words-words-part-2.html

 
have a fun and inky day!
trace  x
Saturday, 17 August 2013

on gossamer wings for Creative Expressions DT

well here is my latest make for Creative Expressions DT (  have you seen they are having a DT call...details here ) using some great coloured drawing inks. I wanted to see what else. I could do with these and have had some fun playing around...on this piece ...I have used them to colour texture paste, ink up stamps and stamp with them, make backgrounds and colour seam binding...

so here is my make :


I started by using the drawing inks to create the background, I squiggled them onto the craft sheet and spritzed with water  the dragged tag through, as with wrinkle free distress. I dried and then re-added more colour until happy. When dry dry I edged with mowed lawn distress ink.


To complete the background I inked up a script stamp with the drawing ink and stamped randomly. Then dried and added some dots through tiny dots stencil using broken china distress ink. I tore off the bottom edge and inked this also.

Now onto the image...I stamped this with olive archival and clear embossed. I then painted with the drawing inks, they are great for fine detail as they have such fine brushes.


I inked the edges with broken china distress ink and tore pieces .


The seam binding was spritzed with water and then I applied dots of drawing inks and more water and scrunched and dried.

I will be back late next week with another make with these drawing inks...

have a fun and inky day!
trace  x

Wednesday, 14 August 2013

I can almost see the sea....

well it is time for another challenge over at Frilly and  Funkie and there is still a week left on this challenge.  
Rebecca's challenge is called By the Seaside... the sand, sea, sun and seawater are the focus of this challenge. We are to use seashells (real or images) and summer at the seaside to guide our creativity!
 
So here is my make :

 
I started with one of Linda's fab large tags , which give great space for adding lots of goodies . I created the background using distress stains, in broken china, tumbled glass and peacock feathers. When happy I over stamped with shells from Artistic Outpost bathing beauties set. I also spritzed with perfect pearls in perfect pearl. I also stamped the dotty stamp from another Artistic Outpost set.

 
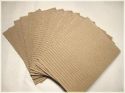
The next layer was a piece of corrugated card, then and inked with  broken china distress ink. I then stamped the bathing beauties onto a piece of cardstock in coffee archival and layered with more dipped cardstock and also some cheesecloth dyed with antique linen stain ( kind of sand colour and to break up the blue tones a little).
 
 
I spritzed with perfect pearls which shimmers in some light...
 
 
I added some more cheesecloth/ muslin dyed with various stains and also some small seashells. I added some driftwood and rusty wire to add more textures. The whole tag was edged with walnut stain DI. 
The sentiment was also edged with walnut stain and is also from bathing beauties set.
 
Now for some of the details :
 
 
 As well as real shells I made some of my own by making molds of actual shells using mold n pour and the making with clear and white mix UTEE. I also made my own little rock pool by pouring molten UTEE into a shell filled with small real shells. 
 
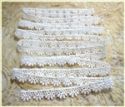
More real and home made shells were added at the top... as well as idea-ology, some of Linda's lovely venise lace trim, dyed with stains and some seam binding also dyed with stains..
 
 Some more lace and idea-ology at the bottom and the tag is complete , hopefully I have captured some of the colours and textures of the seahsore..
 
 
All the products are listed below, make sure you pop across  here and see the rest of my team mates amazing makes and maybe join in the fun!
 
have a fun and inky day!
trace  x
 

Monday, 12 August 2013

finding a way to make it work for creative expressions DT

well today I have a post for Creative Expressions and am still playing with texture paste,I love steampunk so that features too...but it is a card! I am by no means a true cardmaker and there are many out there far more skilled than me , but as cards go I am happy with this...lets see  what you think!?

So here is my make :

I started by cutting a piece of mountboard to the size of the card, as this would take me messing around with inks and paints better than card, but heavy cardstock would be fine. I applied silver texture paste through a great netting stencil. Then I added some distress stains swipes in tarnished brass and black soot...these are just to colour the background.


I then set too with my beloved distress paints, again black soot and tarnished brass, applied to the craft sheet and spritzed and smooshed in. then I heated to dry, which makes the texture paste bubble and pit, great for this type of piece, for a smooth finish, avoid heating.


the next step was to add some more layers , I used some great steampunk stamps and inked in clear and embossed with black detail embossing powder.


I continued this randomly all over the background. Then stamped the main pieces in black archival and coloured up using distress inks in black soot and rusty hinge.I then spritzed and dabbed off.

 
Now for the cogs, I die cut some cogs and added texture paste in a bumpy manner and left to dry. When dry, I applied some tarnished brass distress paint and then some black soot using my finger tip .


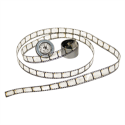
 a few film strip die cuts and the card is complete..

 
So hope you like my texture paste step by step make, 

have a fun and inky day!
trace x