Well a new month and a new challenge over at Country View Crafts Challenge . The theme this month is word play , chosen by the lovely Alison . Make sure you pop across here to see all my team mates yummy makes and maybe you will find time to join in all the fun! So for my fisrt make for this challenge I decided to make a mini book to store some of my favourite words to live by . So here it is :
and the back cover
So now for a few step x step pictures and some details :
I have never made a proper grown up book from scratch before but when the lovely Jenny mentioned this album die by Eileen Hull I knew I had to have a play...
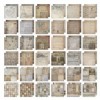
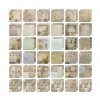
I cut the cover from 500gsm card as I wanted it to be quite sturdy...I also cut 3 sets of pages from ivory card and covered these with Tim Holtz papers. I did trim the side off of the pages for the inside so they fit snug inside.
(the cool thing about the cover is that you can alter the width of the spine, for this book I used a thinner spine ).
I then added some holes in the fold of the pages I added three holes per set of pages, top, middle and bottom...but in the end I didn't use the middle hole .
I added some walnut stain distress ink to the edges of the pages and the spine of the pages . Walnut stain distress ink makes everything look better ...maybe it would work on my wrinkles?
For the cover I added three sets of 3 holes for each of the three sets of the pages. (again I didn't use the middle set of the holes. )
I put some paper string through the top and bottom hole and left the string hanging out of the back of the fold.
Now I posted the string through the holes into the spine of the book cover and tied into a knot . I repeated this for all the three sets of pages . (using the top and bottom holes).
Now to cover the string on the outside (sorry cannot find the picture anywhere :( ) .
I wanted something flexible and inkable so used some grungepaper...love the stuff ! I ran the piece through an embossing folder and then coloured using antique linen distress paint and dried and sanded and then I inked the surface with walnut stain distress ink.
Here is the spine of the book, which I glued with a strong glue on one side of the book and left to dry before adding to the second side.
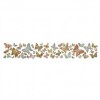
Now for the details...for the cover I covered with paper and added walnut stain distress ink. I added a new firm favourite , some rub ons and some butterflies die cut from Tim's strip die and inked. I added some splattery inky stamping.. To complete I added some dyed seam binding with picket fence , tucked it inside the cover and tied at the front.
For the back cover some more butterflies and some inky stamping . I also added a quote .
For the inside pages ... I covered in papers and inked the edges with walnut stain distress ink. I added quotes on the left hand pages and for the right hand pages used some more paper stack to create some pockets. I covered some tags with paper and trimmed to fit into the pockets . I then added inky stamping and some quotes . Finishing with seam binding on the top .
I won't bore you with all the pages but hopefully you will be inspired to join in the fun and make sure you hop here for lots more inspiration ...
keep those fingers inky!
trace x










Stunning book Trace with beautiful pages and great words you have chosen.
ReplyDeleteLove Chrissie x
Wow I love this Trace,a really gorgeous project.xxx
ReplyDeletewow love this little booklet!
ReplyDeleteGroetjes Karin
Fabulous project Trace xx
ReplyDeleteNow that is a beautiful book!! Just.love it Trace :o)
ReplyDeleteVery cool Trace!
ReplyDeleteLovely Trace, love the wording and muted colour palette. I am actually using this die at the moment too. Lovely piece. Tracy x
ReplyDeleteLove your album Trace and the cover is fantastic. Anne x
ReplyDeleteThis is superb Trace, and I think it may be you and me both that are now hooked on mini books! LOVE the way you've created each of the gorgeous pages to show off some fabulous quotes and the Walnut Stain and ink splatters absolutely finish it all perfectly. Do you think Mr Holtz would recommend us all bathing in that stuff to improve our looks?!! Jenny x
ReplyDeleteTrace, this book is so beautiful and elegant and could be used for anything! Love it!
ReplyDeleteLove this idea and the beautiful neutrals you have used x
ReplyDeletethis is such a beautiful project Trace - full of amazing details - so much much to look at - lovely xx
ReplyDeleteA fantastic project, the pages you have shown us, all look amazing
ReplyDeleteYvonne
Gorgeous Trace, so immaculately done. Nikki x
ReplyDeleteHello Trace.
ReplyDeleteIt looks fantastic, I am so inspired by this that I want to make one myself, but I doubt it will happen.
The word letters on the front of your book speak volumes, the imagination is excited to open up to the first page and goodness you have designed this amazingly well too. I am so impressed.
Smiles:0
Sue
Amazing piece Trace, such a clever design and great added elements, love this!!
ReplyDeleteThis is beautiful! I can see that you had fun during making this, although it took you a lot of time I think... It looks so perfectly made and all so in balance with colours! Great! Hugs, Gerrina
ReplyDeleteWhat a GREAT mini Book... and very useful and hope you enjoy filling it up with all kinds of words and sayings... a sheer delight to view this.... .Love, Light and Peace...Bonnie
ReplyDeleteMe again! playing catch up can you tell?? This is a fabulous mini book Trace love all the detail and your step by step is great. Mo x
ReplyDeleteMagnificent, Trace - what an absolutely beautiful word book... Personally I'd love to see the rest of the pages. Fabulous work with all those delicious papers and quotes and all the tiny butterflies - love it!
ReplyDeleteAlison xx
WOW, just gorgeous! I love the subtle monochromatic theme and the embossed textures! So many different elements that come together perfectly! You're an inspiration! :)
ReplyDeleteAll your projectsare so inspiring! ♡
ReplyDelete